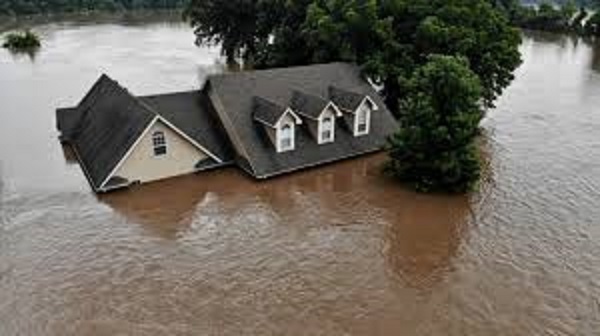
Flooded Home? Can you Save the Cabinets?

How things are done series

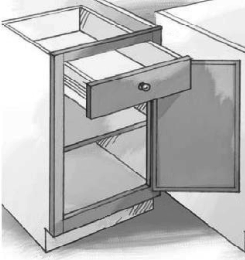
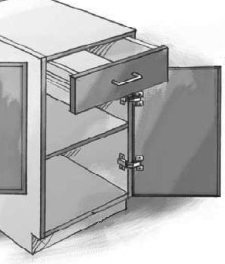
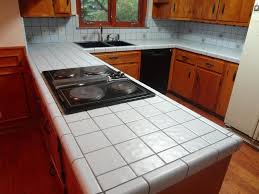
Kitchens flood, we count on it happening at least once in a kitchen’s life and we design so that a broken water line, fridge water line, or washer water hose doesn’t ruin all of the cabinets. The cabinets are set up on 4” tall feet so at most the toe kicks and end panels will take the brunt of the damage and they are easily replaced by design in our cabinets, not at all for face frame style cabinets where the doors are an integral part of the cabinet carcass.

We have had only one case to deal with, where a 3/8” copper prep sink water line broke loose after seven years. it sprayed two doors for hours till the customer woke up and was greeted with a half inch of water in the home. The wood floors were ruined and needed replaced but the cabinets cost a bit over $500.00 to put back in first class condition thanks to our construction methods.

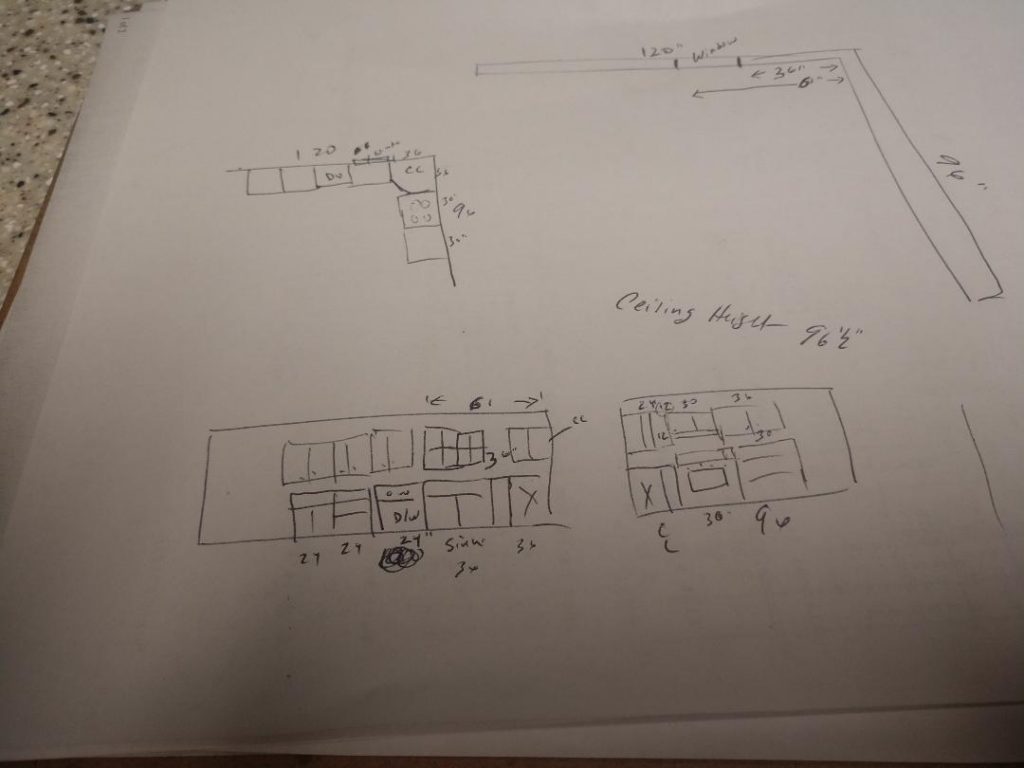
But with Oklahoma flooding in May of 2019, we need to talk about flood water damage versus clean tap water that is a half inch deep at most. When homes are built the studs are 92 5/8” tall and three layers of 2 x 4 plate are added, bottom plate, top plate, and an extra top plate to give the proper height. That puts the height of the actual wall or ceiling at 97.125” tall before the sheetrock goes on. Then you are down to 96 5/8” from floor to sheet rocked ceiling. Two 48” wide x 96” long sheet rock sheets are added leaving a 5/8” gap at the bottom and that saves your bacon. 

How We Build Cabinets

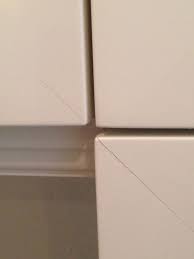
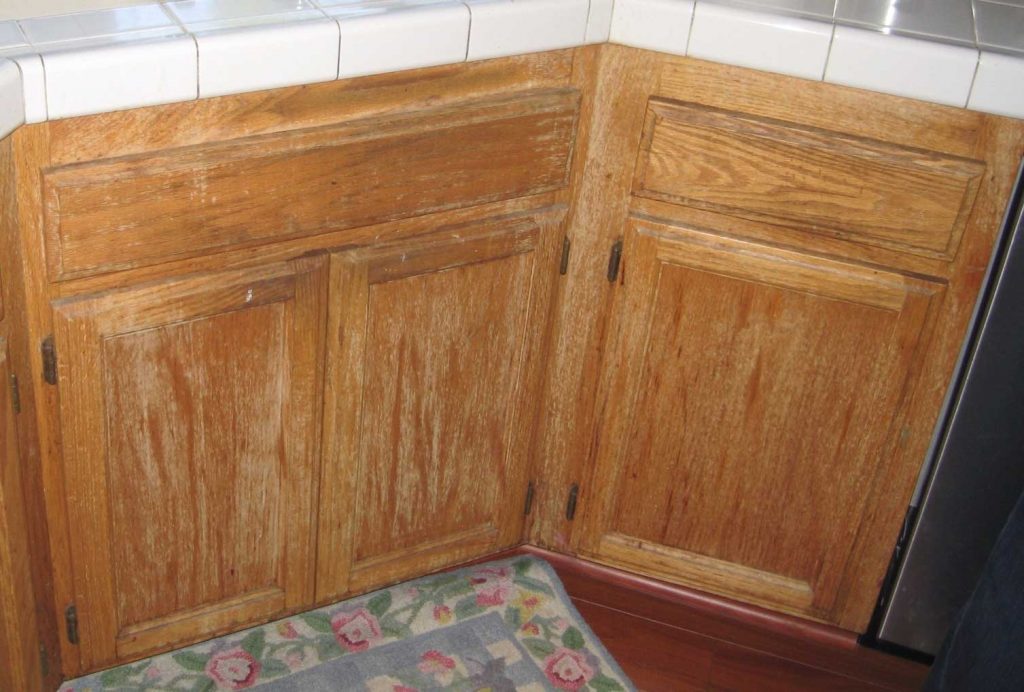
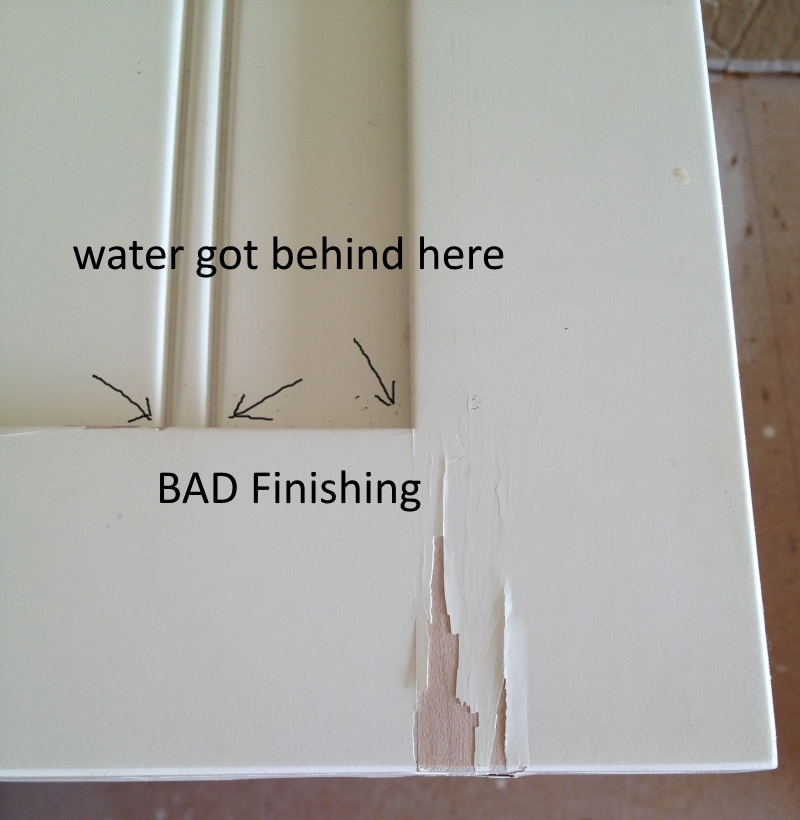
Flooded Cabinets Will Have Finish Problems Down the Road

  • The wood will never be as dry as it was before after kiln drying
  • Water will eventually escape and blister or flake the finish or cause blush
  • Blush is a white looking semi transparent effect under the finish
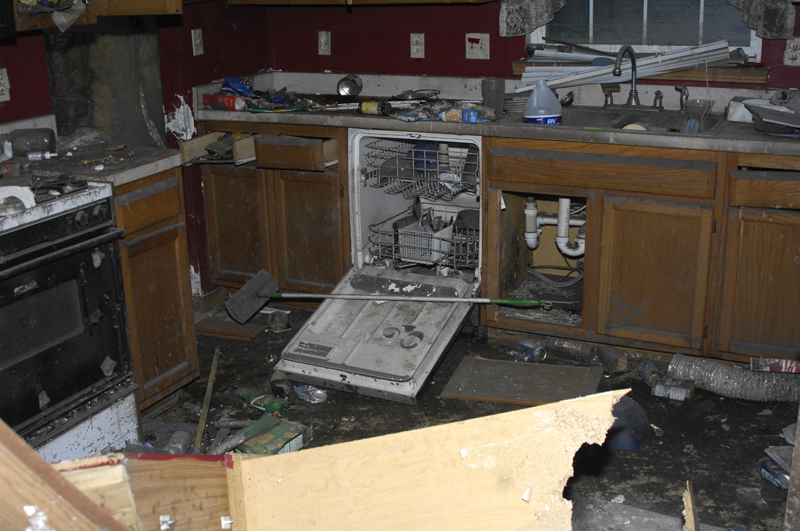
  • Floors and walls behind cabinets will mold if the old cabinets are not taken out


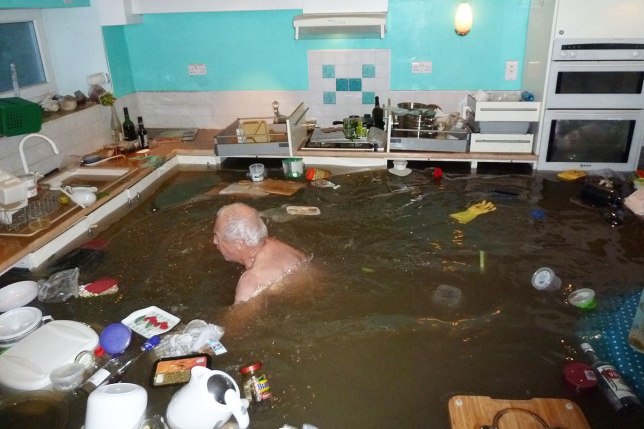
But in a flood all sorts of stuff is in storm water runoff. Animal excrement, human excrement, lots of mud, oil, and chemicals. And the water is high so it soaks into the sheetrock, is wicked up into the insulation and wood framing, leaving behind all of the contaminates when it does dry. Including fungus, bacteria, mold spores, and of course the mud and oil.

If you have a clean water flood you might be able to salvage the cabinets IF they were built up off the floor on nylon legs and you get the water out quickly. Particle board of course isn’t going to survive. First, empty your cabinets and remove as much excess water as possible inside the cabinet using towels or sponges. Pull the doors off and lay them around so both sides are exposed to the drier air, might not warp as much. Get fans going in the house and a good dehumidifier going if it is humid outside and close off the house so you can dry out the air inside the home quickly. A wood stove puts off lots of dry heat, not so much for a vent-less propane or natural gas space heater, water is formed with propane and natural gas is burned.

How things are done series


If you can find the original cabinetmaker some cabinets can be repaired and the ones damaged beyond repair can be replaced. The finish might need stripped and water stains removed using oxalic acid, then treat for mold using bleach and water. If you do not do this the cabinets will begin to stink. After the cabinets have dried thoroughly for several days refinish the cabinets.

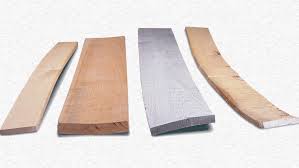
Now whether or not the cabinets will come through this process as good as new depends upon how much water and how long it soaked in and how quick you get the water out. Wood will never return to its kiln dried moisture content after being flooded. Water will cause finishing problems on down the line as the home heats up or the air dries out and the wood attempts to stabilize moisture content with the surrounding air. That causes finishes to flake off.

How about the Professional Restoration Companies?
They will have better fans and dehumidifiers but in the end they sell a service to insurance companies to try to limit the cost of a claim. The insurance company wants them to try to salvage the cabinets, even paying half of the cost of the ruined cabinets to clean them up and refinish will save the insurance company millions of dollars each year.  And a year later when the finish flakes off it isn’t their problem. Even on the Edmond kitchen with little water damage, we did replace the doors that took the direct spray of water for six hours.


How We Build Cabinets

Repairing and Replacing Part of the  Cabinets is Problematic

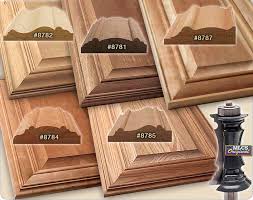
  • Finding the original cabinet maker or one that has the tooling to match doors and cabinets is tough
  • A stripped finish will stain out totally different than new wood on the replacement cabinets
  • Bleach and water and oxalic acid and water adds more moisture to the already wet wood
  • Insurance saves a lot, you get sub par cabinets with a portion of the lifetime use used up already

 And have never had a call back saying anything bad happened with the kitchen. But sanding and striping those doors for re finishing, well, that would be ill advised given the cost of the new doors and finishing was close to the cost for slap dash work to save a few dollars for the insurance company.

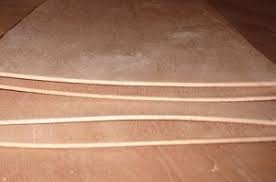
If you Google flooded cabinets the restoration companies will talk about using wood glue to fix delaminated plywood and adding braces to strengthen weakened cabinets. Not good long term, you know that. And the floor and drywall behind the cabinets is likely to mold unless the cabinets are removed for drying the wall and even replacing the sheetrock. A month of drying and dehumidifying will help if you have the time.

But is it better to save the insurance company a few thousand dollars or you be made whole with cabinets that will return your home to its previous value?


Face Frame Cabinets
Frameless or European Style

What is the Difference Between Face Frame and Frameless Cabinets?

How things are done series

Face frame is the narrow border that runs around the face of an old style cabinet and between the drawer and the door.  The idea is that it adds some stability to the cabinet, increases the racking resistance (sideways force).

The problem is that the old style face frame cabinets are very labor intensive and the cost and other drawbacks do not make up for what little racking resistance is added.  After all, once cabinets are installed most are fastened to a wall and most are trapped between walls, racking resistance is hardly needed.  But it was how cabinets were built back in the day.

Then World War II happened and not only were most of the cabinetmakers dead or disabled, most of the other skilled workers were gone too. And there were millions of homes in bombed out cities needing cabinets and needing them quickly.  So frameless cabinets were invented. You can use more technology to build frameless cabinets because of the system holes, a series of holes 32 mm apart, are used to hang drawer slides, hinges, and shelf pins.  Parts can be made with precision and they will fit without being adjusted or fitted by hand.

Learn more Here at this link

Frameless or Euro Style has Benefits

  • Easier to produce with the right equipment
  • around 20% additional accessible storage
  • easier to clean, hardware more solidly attached
  • Must be accurate due to tight tolerances needed


Face frame cabinets usually have drawer slides hung on plastic brackets or flimsy wood U shaped dividers, frameless cabinet slides are solidly attached to the side of the cabinet, no bending which causes drawers to drop out of track.

The only downside is the precision needed on frameless because of the super tight reveals or distances between the doors and drawers.  Face frame doors and drawers, get them within a quarter inch and no one will see the differences because of the wide spaces between the doors and drawers.

We started doing frameless or Euro style cabinets in order to slash the labor costs on our work.  Because of that we didn’t have to raise prices for about ten years.  And it is easier to train workers for Euro style than the older face frame cabinets.


Getting an Estimate

Drawings can be very simple and crude

 The crude drawing above was done in a few minutes.  A 120″ wall and a 96″ wall in an L configuration.  The ceiling height is marked down, and there are rough elevations showing how the cabinet boxes are set.  The window is located from the  right side but it really doesn’t matter which side is used to measure from.  The drawing does show open space on each end of the L shaped kitchen,, that is important, or if there is a wall there we need to know that the set of cabinets has to  fit in a confined area.


Not a lot is needed for an estimate

Measurements?  Get close, we will double check anyway.

The main points are to show how the walls are arranged, measurements locating windows and doors or other things that need to be considered, ceiling height, and a basic idea on how you want the cabinets arranged.

No need to spend a lot of time, a pencil sketch will do fine.  There are room planners online and kitchen planning, most are free and easy to use. 

Some things are assumed like placing the sink under a window or in the middle of a peninsula if there is no window.  We usually don’t move sinks or stoves very far to avoid costly wiring and plumbing changes but they can usually be moved  ten to twelve inches if needed.  

Appliance sizes are needed as well as what kind of sink will be used so the sink cabinet is large enough.  Links to appliances help but the exact specifications can be found later. A few notes describing anything special helps and sending pictures of other kitchens helps as long as you identify exactly what you like about the picture.   The kind of cabinets matters, if you see something off our website right click on the picture and “save as” and send it to us. We will call  if there are any questions.

More info on quotes!


Cracked Mitered Doors

That Was a Stupid Idea….

There is always someone looking for a cheaper way to make things, and I said cheaper, not faster or better.   Cope and stick doors have been around for hundreds of years with the original joints being hand made with hand tools.

We got faster thanks to the industrial age, motors and shaped steel cutters that hogged out the profiles much faster than a molding plane pushed by hand.  But it is still time consuming to make a good joint. 


And tear out, the bane of woodworking, the splintering of the back side of a board when cutting, routing, or shapering as the cutter comes to the end of the board on the edge of the board.  Well, rails, the horizontal parts of a door, which are called the cope, are all edge grain so one edge usually splinters so you have the stick part that leaves a shaped perimeter around the inside edge of the perimeter of the door.

Ditto on the shaping of the edges of the doors.  the trailing edge chips so you have an angle door edge to remove that chip and you have to pass the door back through the shaper  on a large percentage of the doors to remove any end grain chipping.

Learn more Here at this link

Give me Your Checkbook Till We Leave the Store…

  • Mitered doors sure are purty…..
  • Picture frame joints
  • Very deep profiles that are impossible using normal methods
  • They will crack at the joints and open up either on the toe or the heel of the joint as the humidity changes


So someone, a machinery maker no doubt wanting to sell new machines to replace the perfectly good old machines in the cabinet shops, came up with the idea of mitered doors.   The rail and stile stock is all identical, cut at a 45% angle on miter machines that can do both cuts in one operation, with some sort of biscuit or loose tennon  inserted to make a glue joint.  Sometimes machined in place using CNC routers.

Then a minimum wage worker slaps some glue in the hole and clamps them up and shoots a pin nail in the joint and removes them to assemble the next door.

The problem is systemic, wood shrinks across the grain so anything you miter together will shrink and show a gap at the toe or the heel of the corner.  That cracks the paint, shows an ugly gap, and of course the shrinkage breaks the glue joint leaving it just a matter of time before the doors fall off the cabinets.


At best it is just the majority of the door joints cracked and looking shabby.  But hey, someone made some good money selling those doors to the homeowner and is it their fault the homeowner was uneducated?  I say it is the shop’s fault but if you already invested in the equipment you gotta make it pay off.  Cope and stick doors might crack on a few doors but they will not ever fall apart if property machined, properly glued, and clamped.


Tile Countertops

That Was a Stupid Idea….


I learned this one the hard way. Luckily it was my first “home”, a trailer house.  Even then it got ripped out a few months later.

“But they have used tile for decades in the older homes.”  Yup, with a 2″ thick concrete base, not glued on some plywood with mastic.

Tiles crack unless the base is thick and massive.  Add to that the chipping and grout cleaning, well tile countertops do not age gracefully

The edges fall off when bumped, they always look dirty and the grout flakes out plus you don’t want to think about the amount of bacteria hiding in that grout.

Learn more Here at this link

But it is Cheaper..

  • True, the first time you put it in
  • Not so cheap when you have to replace it
  • Yup, you can put hot pots on it, the one grace it has
  • Going to devalue your home when you go to sell


A tile top could be made for a few hundred in materials but if you hire the job done you will spend $500 at a minimum and more likely $1000.00.  That will make a good sized payment on a solid surface top that will last the life of the home or until you are sick of looking at the kitchen.  Or you can purchase a laminate top for that kind of money.

Tile on the backsplash works, up out of the way, no one cutting or pounding on it to break up the grout.  Away from most stain other than some spattered grease and oil, so seal several times a year. 

Glue surface areas are like  beams in engineering terms, half the depth or surface area, four times less holding power or strength.  Coupled with the angle of the annual rings and you can have some warped top rails that move so much that the elastic qualities of the glue fail and the glue joint fails.


Bead Board Doors

That was a stupid idea….

With any luck you were smart enough not to Google kitchen porn before you clicked on this category.  Gonna need to wash out those eyes if you did and clear your web browser history before grandma or one of the kids picks up your tablet or laptop.

Kitchen porn is that which is sexy and exciting but has no lasting qualities.  It is a bad idea personified, your nemesis that will lure you onto the rocky coast of kitchen remodel remorse.    You find it in national magazines and at the big box stores or through advertising that has a purpose of fleecing you of hard earned dollars while keeping the costs down on what they spend to do your remodel.  Money in their pockets is the goals and if you tire of the monstrosity, well they make money again replacing what they sold you.

Learn more Here at this link

Put Down the Beadboard Door Sample…

  • Sure is purty…..
  • Crevices fill with grease and dirt over time
  • Few sheets are true 1/4″ thickness or good two sides
  • Usually has fibers crushed during manufacture


Beadboard is interesting and lots of folks wander in asking about using it in the door panels.  The problem is that food, grease, lint, and fibers build up on the grooves over time.

The sheets are usually made with a soft tropical hardwood as the core and ran through grooving machines using roller dies to smash the wood fibers into the bead shape.  This leaves a jagged edge that catches fibers out of any cloth used to clean it and the sheets are not true 1/4″ most of the time so there are gaps around the perimeter of the door panel to store more gunk.

And no, you can’t pile on enough clear coat or paint.  The coating will flow right around the sharp points and surface tension will cause it to not fill the defects.


Five Part Drawer Fronts

That was a stupid idea…..

Five part drawer fronts, no, no, no, and no.

The narrow drawer fronts on the cabinet set to the left are five part fronts. Why are they named that?  Two stiles, two rails, and a center panel.  Five parts.  Just little doors actually, made the same way.

They are not good for several reasons.  First, that tiny little strip of material in the middle, the worst place to put a pull by the way, means the rails (horizontal parts) have to be less than 2.625″ wide, a standard quality rail/stile width.

Narrow boards tend to warp much easier due to the less width of the part.  Fewer annual rings in the part and there is a magic number on width, too many annual rings and you have cupping of the lumber.  Too few and all the annual rings are of the same angle and the part turns trapezoid shape across the width as it ages.

Learn more Here at this link

Betcha they will warp and the joints will crack..

  • Standard drawer front is 6.1875″
  • Minus 2.625 x 2,  means 5.25″ of rails
  • Center panel only 7/8″ wide
  • Looks stupid Forrest. Just saying….


So, “cabinetmakers” try using narrower rails, 1.5″ instead of the normal 2.625″.  About 1/2″ of each rail is grooved away, leaving a normal width “cheek” on the end of the rail at 2.125″ x .5″ surface area.  That is what is glued to hold the drawer front or door together.

Taking that rail width down to 1.5″ means 1″ x .5″ of surface area to be glued.  That is half the surface area of a properly sized rail. 

Glue surface areas are like  beams in engineering terms, half the depth or surface area, four times less holding power or strength.  Coupled with the angle of the annual rings and you can have some warped top rails that move so much that the elastic qualities of the glue fail and the glue joint fails.

But they sure are pretty in the magazines and in the showroom.


I already started building your kitchen cabinets you know….

How things are done series

The Carpenter Shop stocks common cabinet components for building cabinets in both raw MDF and melamine MDF.

We also have melamine MDF stock sizes of upper and lower cabinet that are ready for assembly, over 750 linear feet of cabinets with either stock slab doors and drawer fronts or we can make raised panel or five part doors in just a few days.

Who carries inventory in these Just in Time manufacturing days? The businesses that understand that customers have a choice and go elsewhere if you keep them waiting too long. For that reason, and to keep our costs as low as possible our overseas shop makes common kitchen and bathroom cabinet parts for us by the container load and once or twice a year we get in a container load to re stock our inventory.

Learn more Here at this link

Common Components Stocked

  • Parts like cabinet ends are nearly all the same
  • Working on parts when the shop is slow helps…
  • Construction time cut by about a week
  • Using cheaper labor allows lower  prices


We won’t keep you waiting for that new kitchen nor will we have your old kitchen torn up for months.

Call us at 405-942-2644 or email rough drawings of the walls showing locations of the things like doors and windows, pictures are nice as long as you tell us what you like about each picture.


Looking forward to finally finishing your kitchen.
Al Gerhart al@thecarpentershop.net

450-942-2644


“But I want all wood cabinets…”

How things are done series

You get this on occasion, new customers asking for all wood cabinets. That is actually a legal trade term that the government cooked up and it includes particle board which is indeed wood and glue.  MDF is far better, stiffer, flatter, more consistent in thickness due to the compressed nature of the material. MDF is much heavier but that is only a problem for the cabinet maker.

The reality is few cabinets are made of all wood as you and I would classify it. Wood is unstable in large widths, it likes to cup and warp and twist. The design of a raised panel door isn’t because it is pretty, that outer perimeter of rails and stiles helps keep the center panel reasonably flat while the extra space between the panel edges and the inside of the groove (called cope and stick) allows the panel to shrink and well without creating gaps or breaking the glue joints in the stiles and rails.

Learn more Here at this link

Wood is unstable

  • It warps, twists, and cups easily
  • Wood shrinks and swells all the time
  • Build the components with the correct materials
  • Plan on expansion, build it into the design


Things like trim, toe kicks, rails and stiles, even drawer fronts up to around 12″ are fine in solid wood. Over that, expect some issues and be ready to live with them. And even in small sizes, the width will change along with the humidity in the room so there are tolerances for solid wood parts to allow for shrinkage and swelling.

Things like carcass panels, sides, tops,, bottoms or decks, and shelves need to be an engineered panel product. Parts that need to be solid wood are rails or stretches, parts that have screws and nails going into the ends where an engineered part would split, the wood will accept the nail or screw and hold long and strong.

In the end it is about using the best materials in the best spots. And NO particle board, ever, MDF, Classic Core blended MDF/Plywood panels, or plywood (where it can be used safely) make good carcasses.