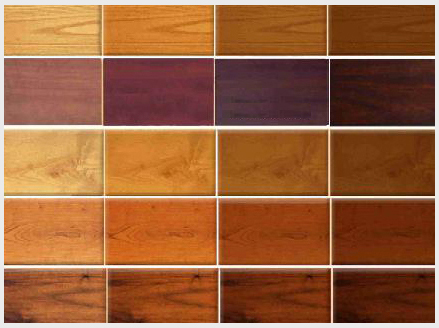
Glue Joints Stronger than the Wood
This doesn’t happen by accident
Doors are the biggest expense in a kitchen job and also the most time consuming for most shops that haven’t invested in good door equipment. So most Oklahoma City cabinet shops outsource their doors which is a very bad thing to do.
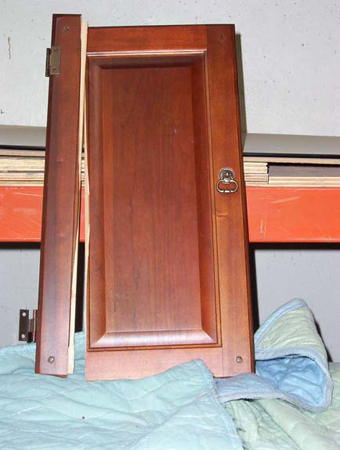
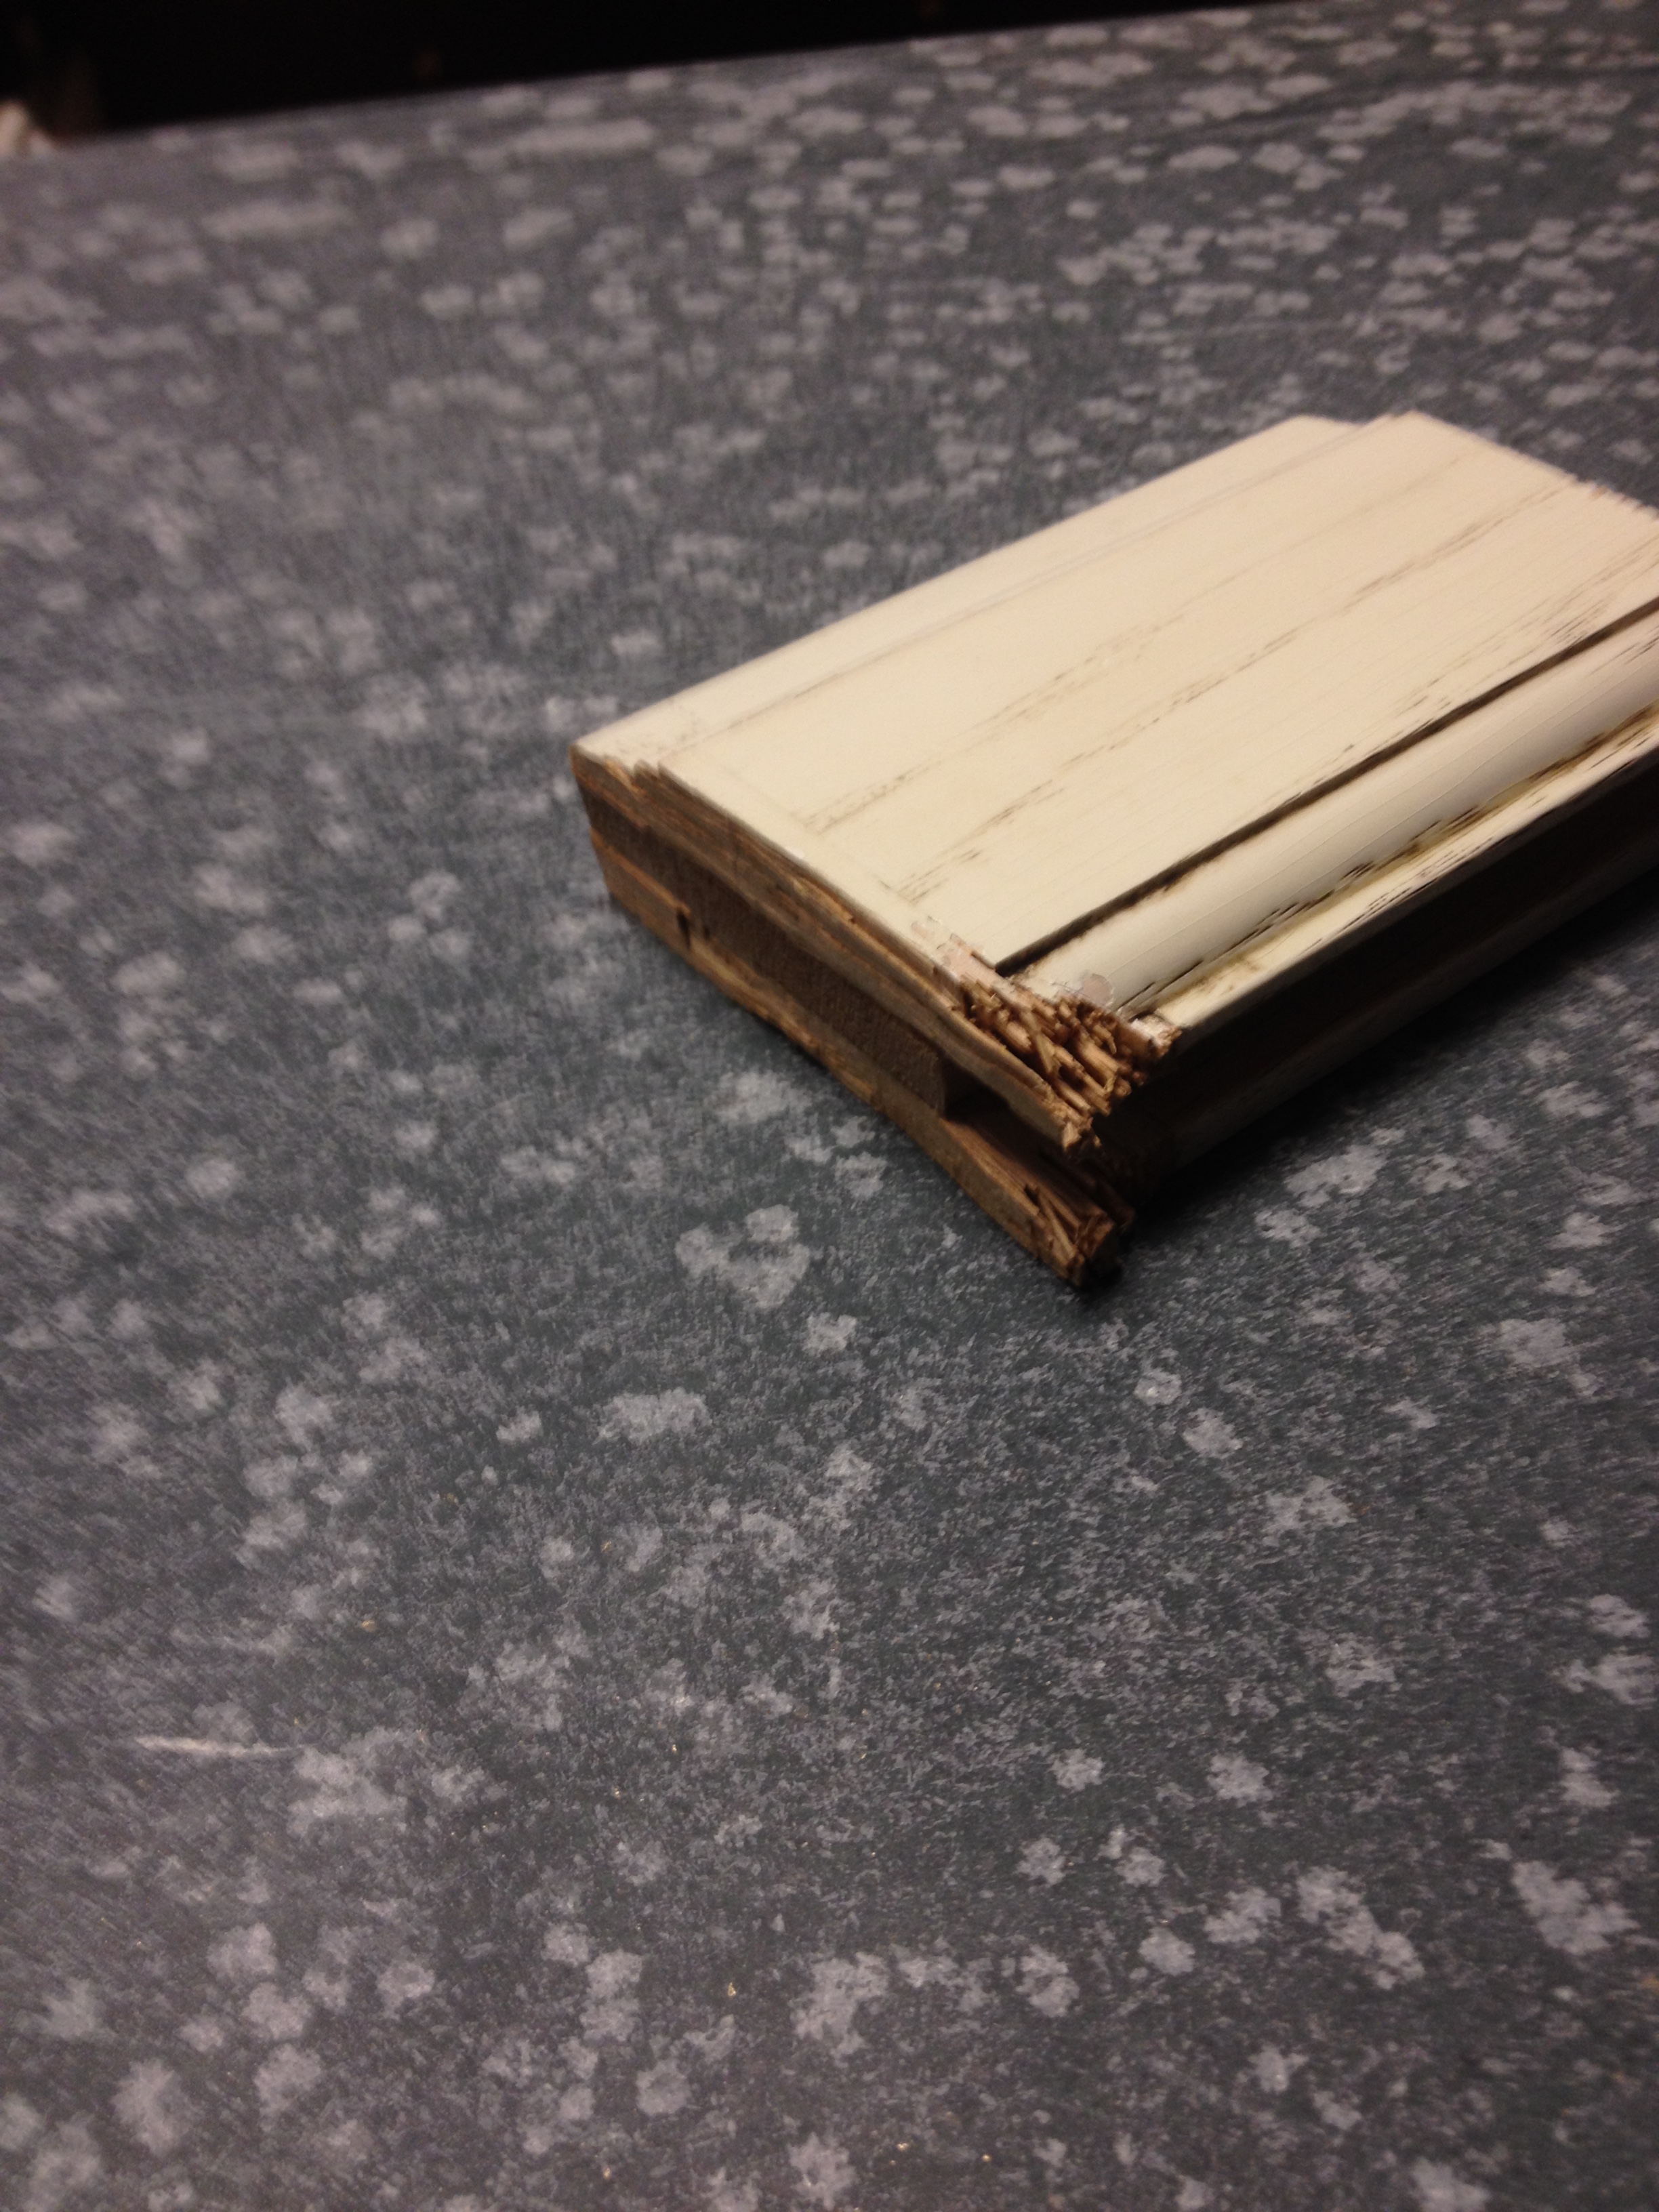
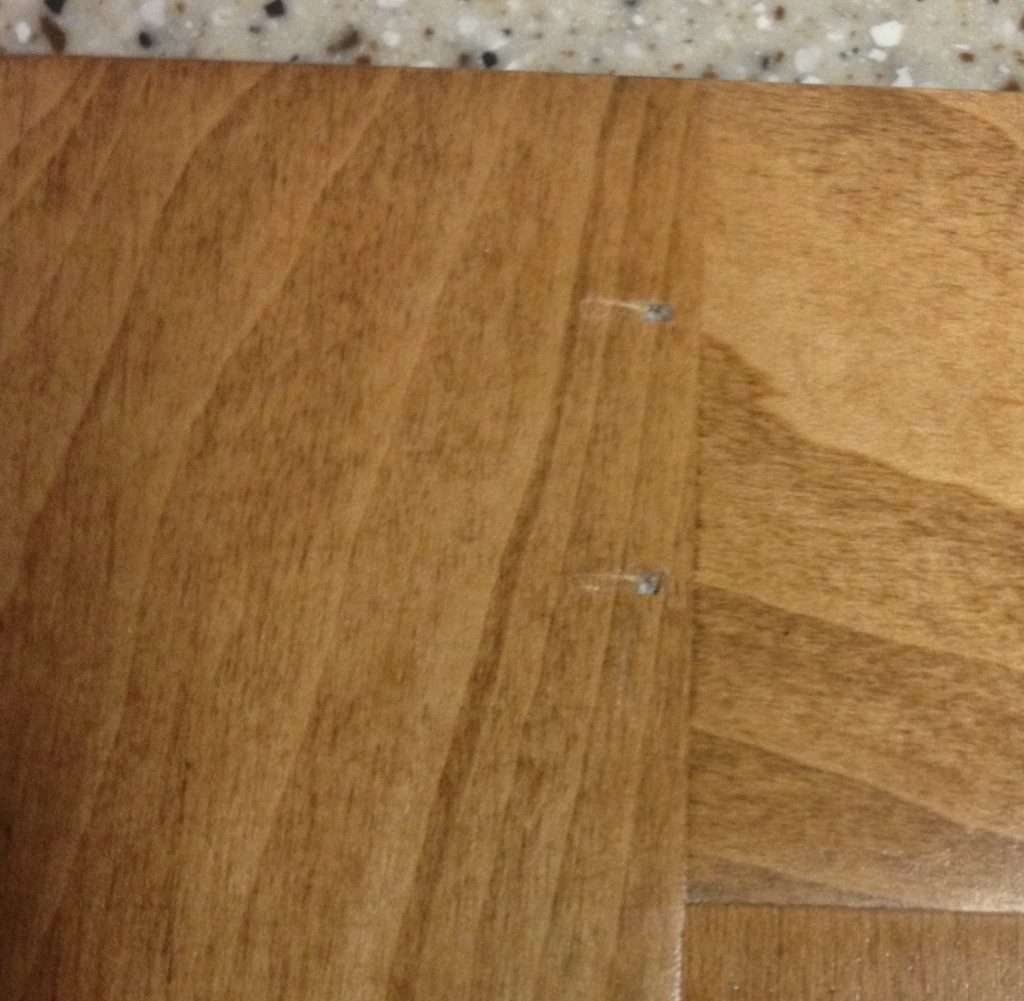
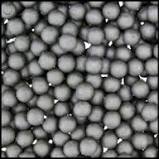
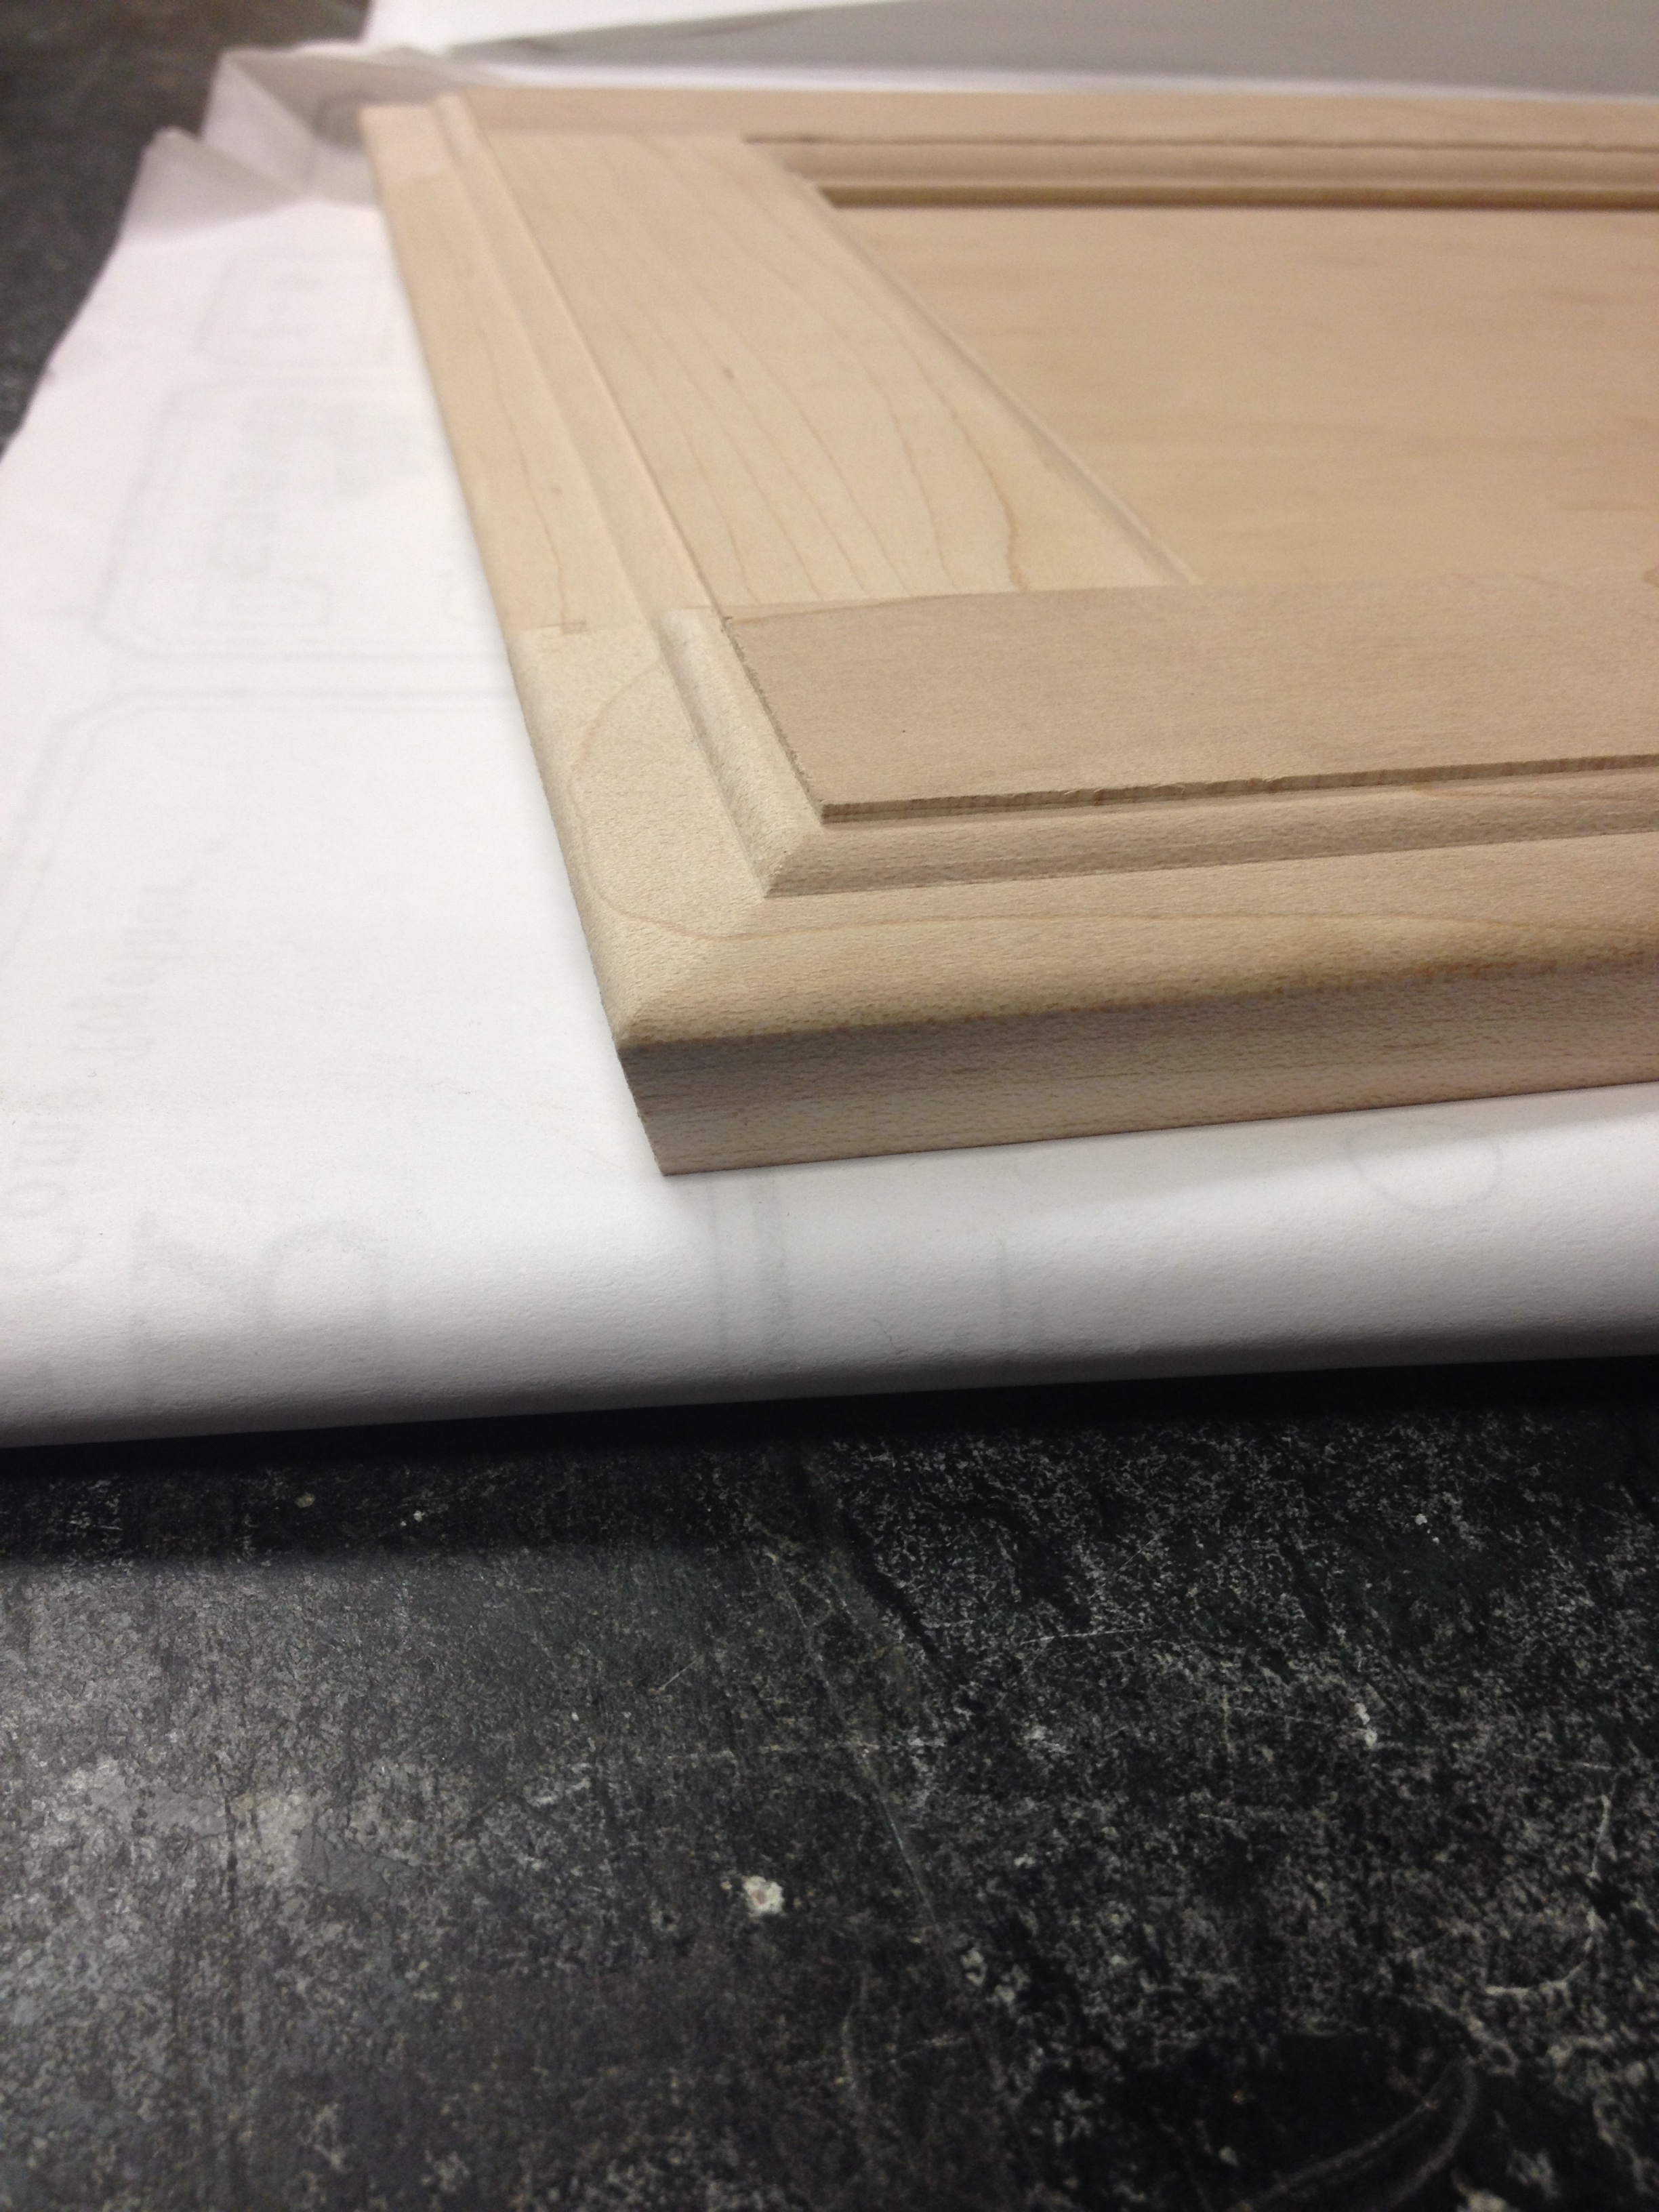
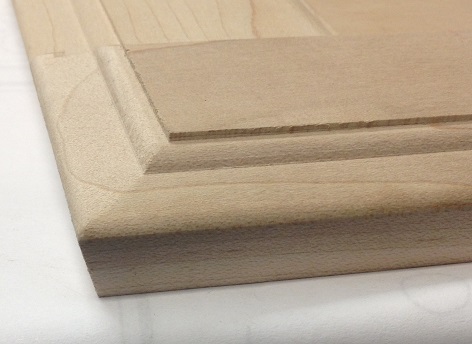
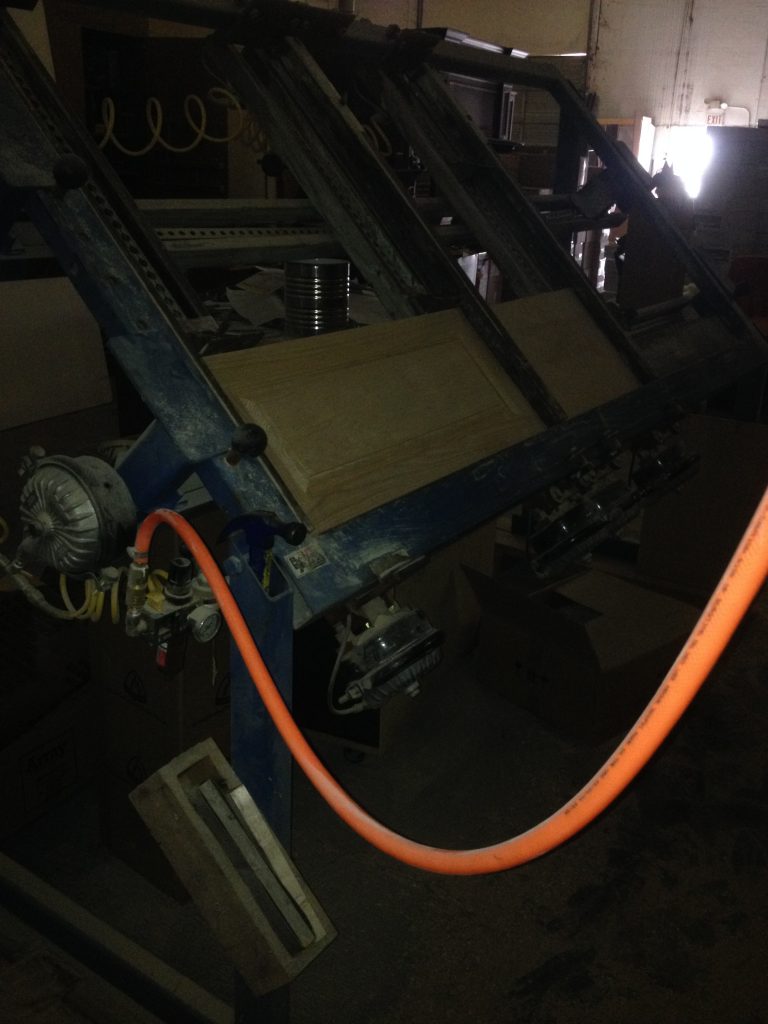
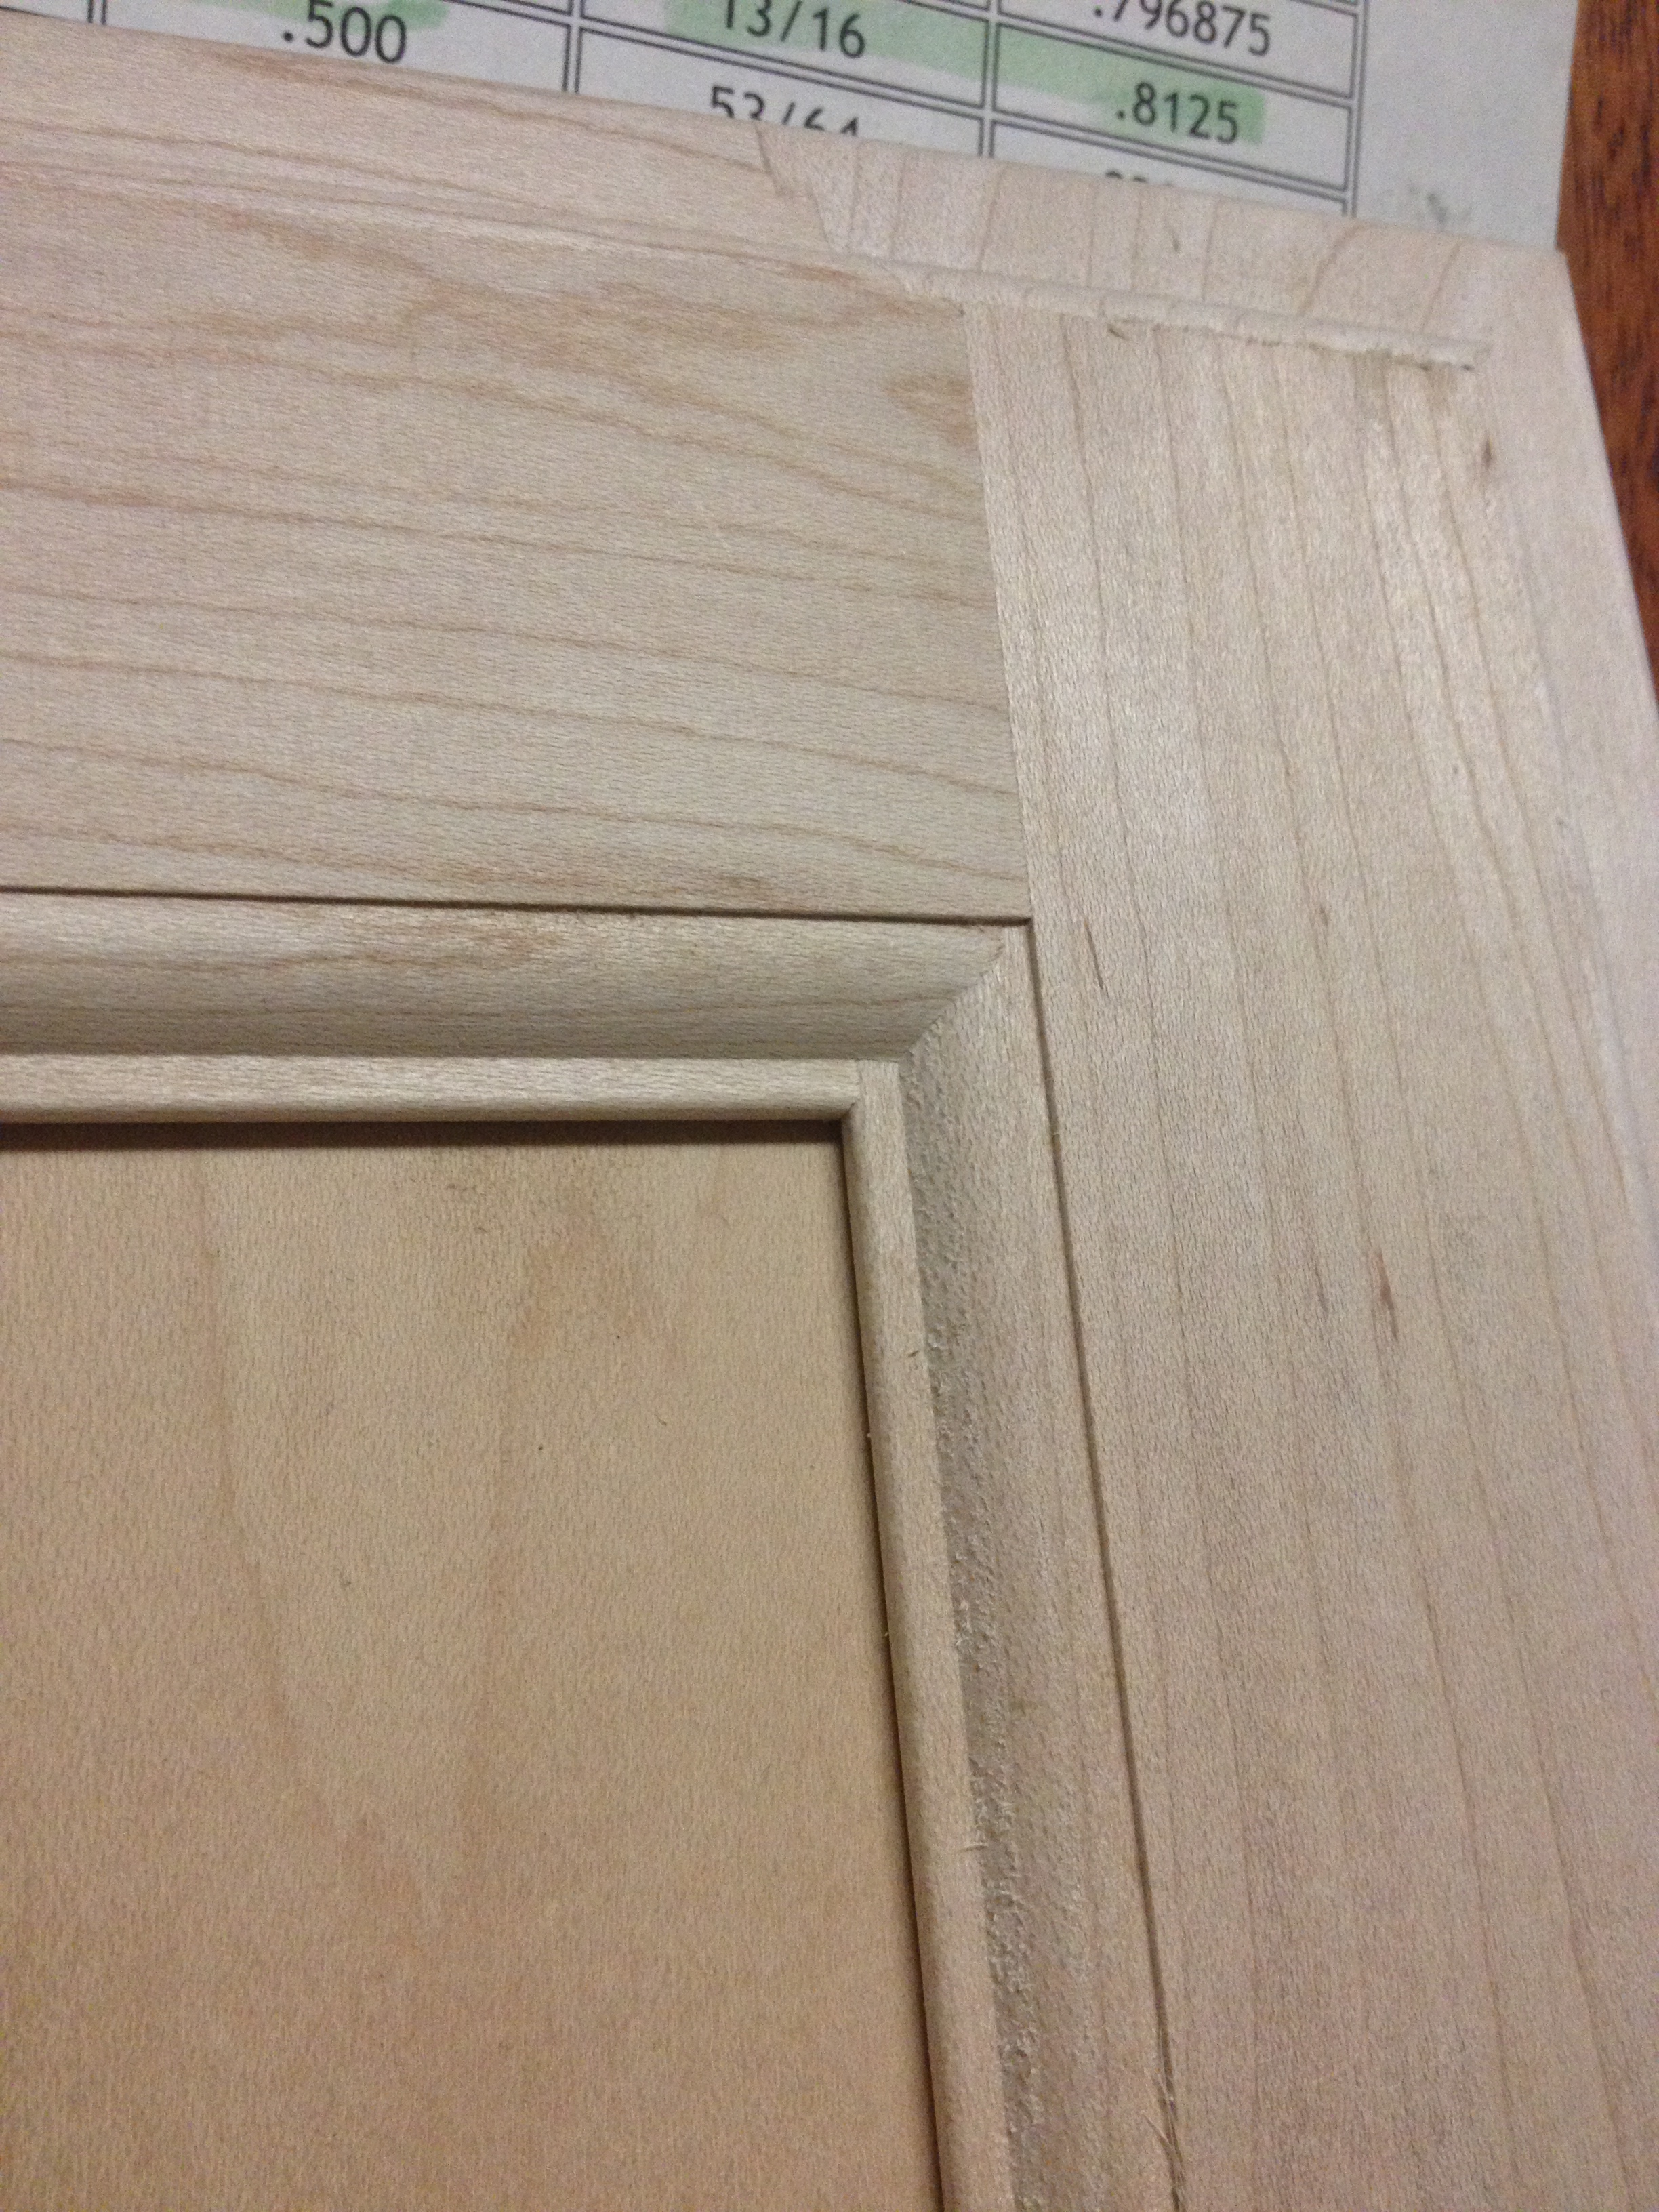
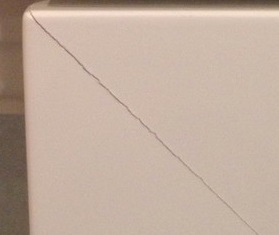
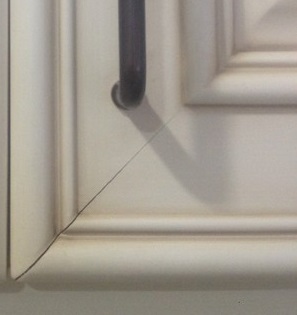
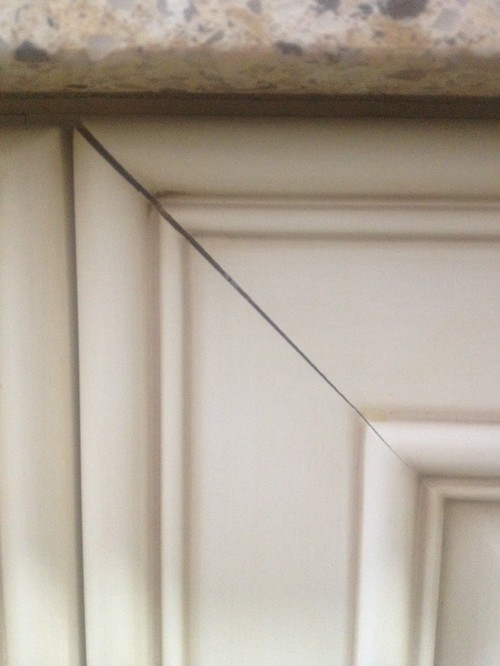
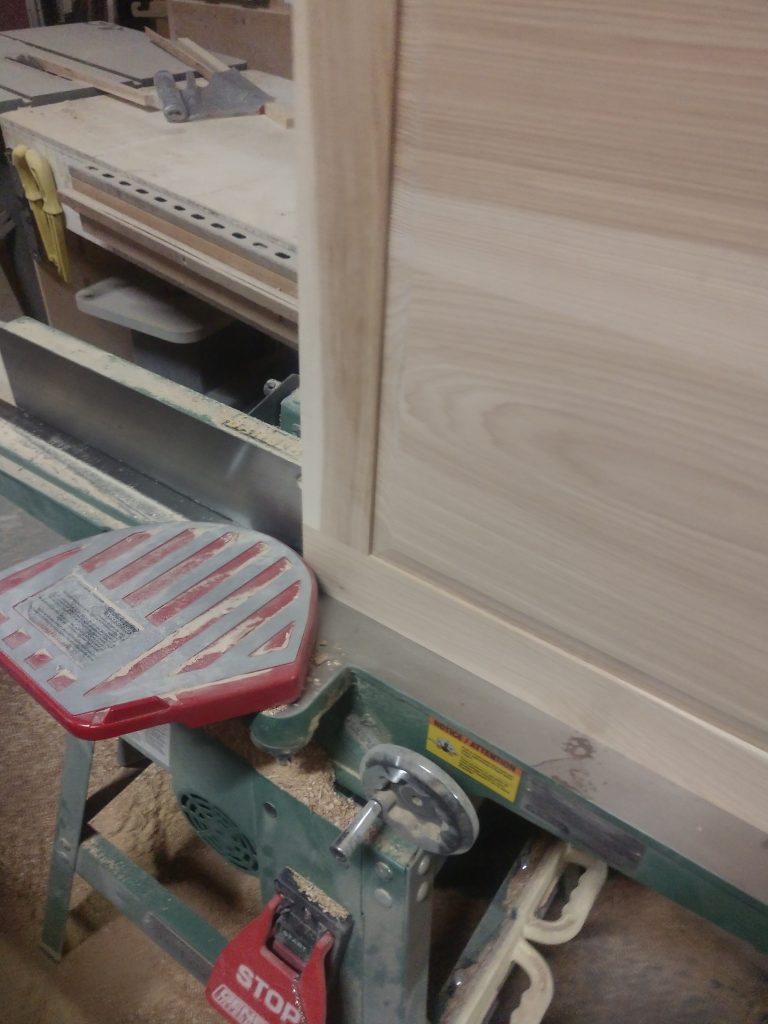
Take a look at the pictures above, a door that has had the joints broken on purpose to test the joints. Notice how the wood splintered, the glue joint held? That is the best possible outcome where the glue is stronger than the wood itself. But that is not an easy task unless you have the right equipment, use the right practices, and refuse to settle for poor quality doors.
Whether you are looking for new kitchen cabinets or replacement doors and drawer fronts for your old cabinets you want to have doors built that will hold up for many years.
We Build Doors Differently for Very Good Reasons
- We never nail the corners of a door
- Space balls, nope, not the movie
- Shapered edges is the only way to go
- All doors are made in our shop
- No mitered doors, they are junk!
What it takes is super tight tolerances in machining the cope and stick joint. That is a male/female joint with the male part being the cope and the female or grooved part being the stick. You need sharp cutters and well maintained bearings on the shapers that cut the joints and there is another trick, never nail or pin the backside of a door.
That is the first thing to look for when looking at a cabinetmaker’s work because it is the most obvious sign of cutting corners. Seeing nails in the back of a door joint means one thing; the door maker is clamping the doors, shooting two pins in each joint, and tossing the door in a stack so he can get his quota of doors done for the day. Keep reading to find out how we get good doors or skip way down to the wood species and profile option.
If you are looking for replacement cabinet doors in Oklahoma City or anywhere in Oklahoma, send us a list of the opening sizes with each opening labeled one or two doors. A crude sketch is best so that we know the layout of the doors. Just draw each wall of your kitchen, showing the cabinets, drawing boxes where the doors and drawers go. We will take your measurements, add 5/8″ around all sides, minus 1/8″ for the center gap if there is a pair of doors in one opening, and generate a list of replacement cabinet door sizes and price them out for you via email.

Good Doors take Time to Make
You are going to a lot of time and trouble finding the best Oklahoma City cabinetmaker to make your cabinets and I bet no one has mentioned the right way to build doors. Nailing and stacking is bad because once you clamp something you squeeze most of the glue out of the joint and if you allow the wood to relax the glue joint is very weak as the wood pulls back and the joint is not only starved of glue, it is twice as loose as it should be. A very easy way to test this for yourself is to find an old glue bottle that has some glue dripping down the nozzle or side. It snaps very easily, right? But how does the glue hold if it is so brittle?
Never Nail the Joints in a Cabinet Door
- It isn’t needed
- Its a sign of shoddy work
- A sure fire sign that the door wasn’t clamped till it cured and the glue joint is starved and weak
The answer is that the glue is only brittle if the glue is allowed to cure in layers thicker than one thousandth of an inch thickness. Any thicker of a joint and the glue can crystallize, just like water does when it freezes, and it is that crystal lattice work that makes the glue weak.
The way to avoid this is very simple…leave the doors clamped up until the glue cures! Go do something else while the glue cures.
Our door clamp can hold four good sized doors at a time so what we do is clamp up four doors as soon as we have some parts ready then go back to making the rest of the door parts while that set of doors cures out. We also use a very expensive glue from Germany, made by the Dorus company, and it cures very quickly and is not at all brittle even in thicker joints.
You can glue up a panel and run it through the planner that pounds the crap out of it about fifteen minutes after you clamp it up. We don’t though, all the doors are allowed to cure overnight before they go through our wide belt sander so we know the glue is well cured. There is another reason why doors should be clamped till cured, if they are built properly there are eight space balls in each door that are pushing the door apart.
Wood’s Gonna Swell
Lumber will swell more if it comes out of the center portion of the tree, warp or bow more if it comes out of the edges of the round tree, so it is only a few doors that just happened to get the center section of the tree as the raised panel that caused the problem.
Before we started using space balls back in the early 2000’s once every five or six years we would have a wet summer and one or two doors out of previous kitchens would have a door crack and the customer would bring the door in for repair.
It wasn’t a problem to remake the broken doors and refinish but it was costly and a hassle for the customer but once we switched to space balls there were no more broken doors since.
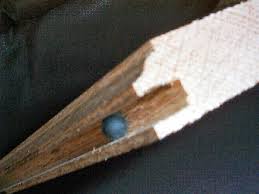
Space Balls
- Provide room for a swelling panel to expand
- Keeps a shrinking panel centered in the door
- Forces you to clamp the door till cured
- Prevents a loose panel from rattling around
Space balls are small rubber balls that are placed on all four sides of the door raised panel, two per side. You can barely shove the door together without a clamp because while the raised panel is cut 3/8″ smaller than the door space the space balls add up to 1/2″ so the door needs clamped to compress these rubber balls. If you clamp and nail a door your glue joints are huge and weak.
The space balls keep the door centered if it shrinks and doesn’t allow the raised panel to rattle around when being closed. it also provides that 3/8″ of extra space for the raised panel to expand if we have a very wet summer.
Shapered Door Edges
The next thing to look for are shapered door edges, not routered edges. A shaper acts like a jointer, it makes the profile but it also shaves a 1/16″ off the edge as the door goes through the machine. When you cut wood on a table saw, even with a good power feed, it isn’t perfectly straight and there will be internal stresses that are released as you cut the board down into narrower strips. If you don’t use a shaper for the door edges the doors are never quite straight. On a face frame set of cabinets the doors are pretty far apart and maybe it is less noticeable except where two doors meet. But on Euro cabinets the tolerances are much tighter so straight doors are needed. Can’t make the best cabinets in Oklahoma City without the right equipment.
Why Shapered Edges?
- The process straightens the edges of the door
- Very smooth surface due to large diameter cutters
- You can climb cut, cut the wrong feed direction for a very smooth surface even in woods like maple
- Shapered profiles hide small unavoidable warps in solid wood doors, 3/16″ warp on a 20″ x40″ door is considered normal by the door industry.
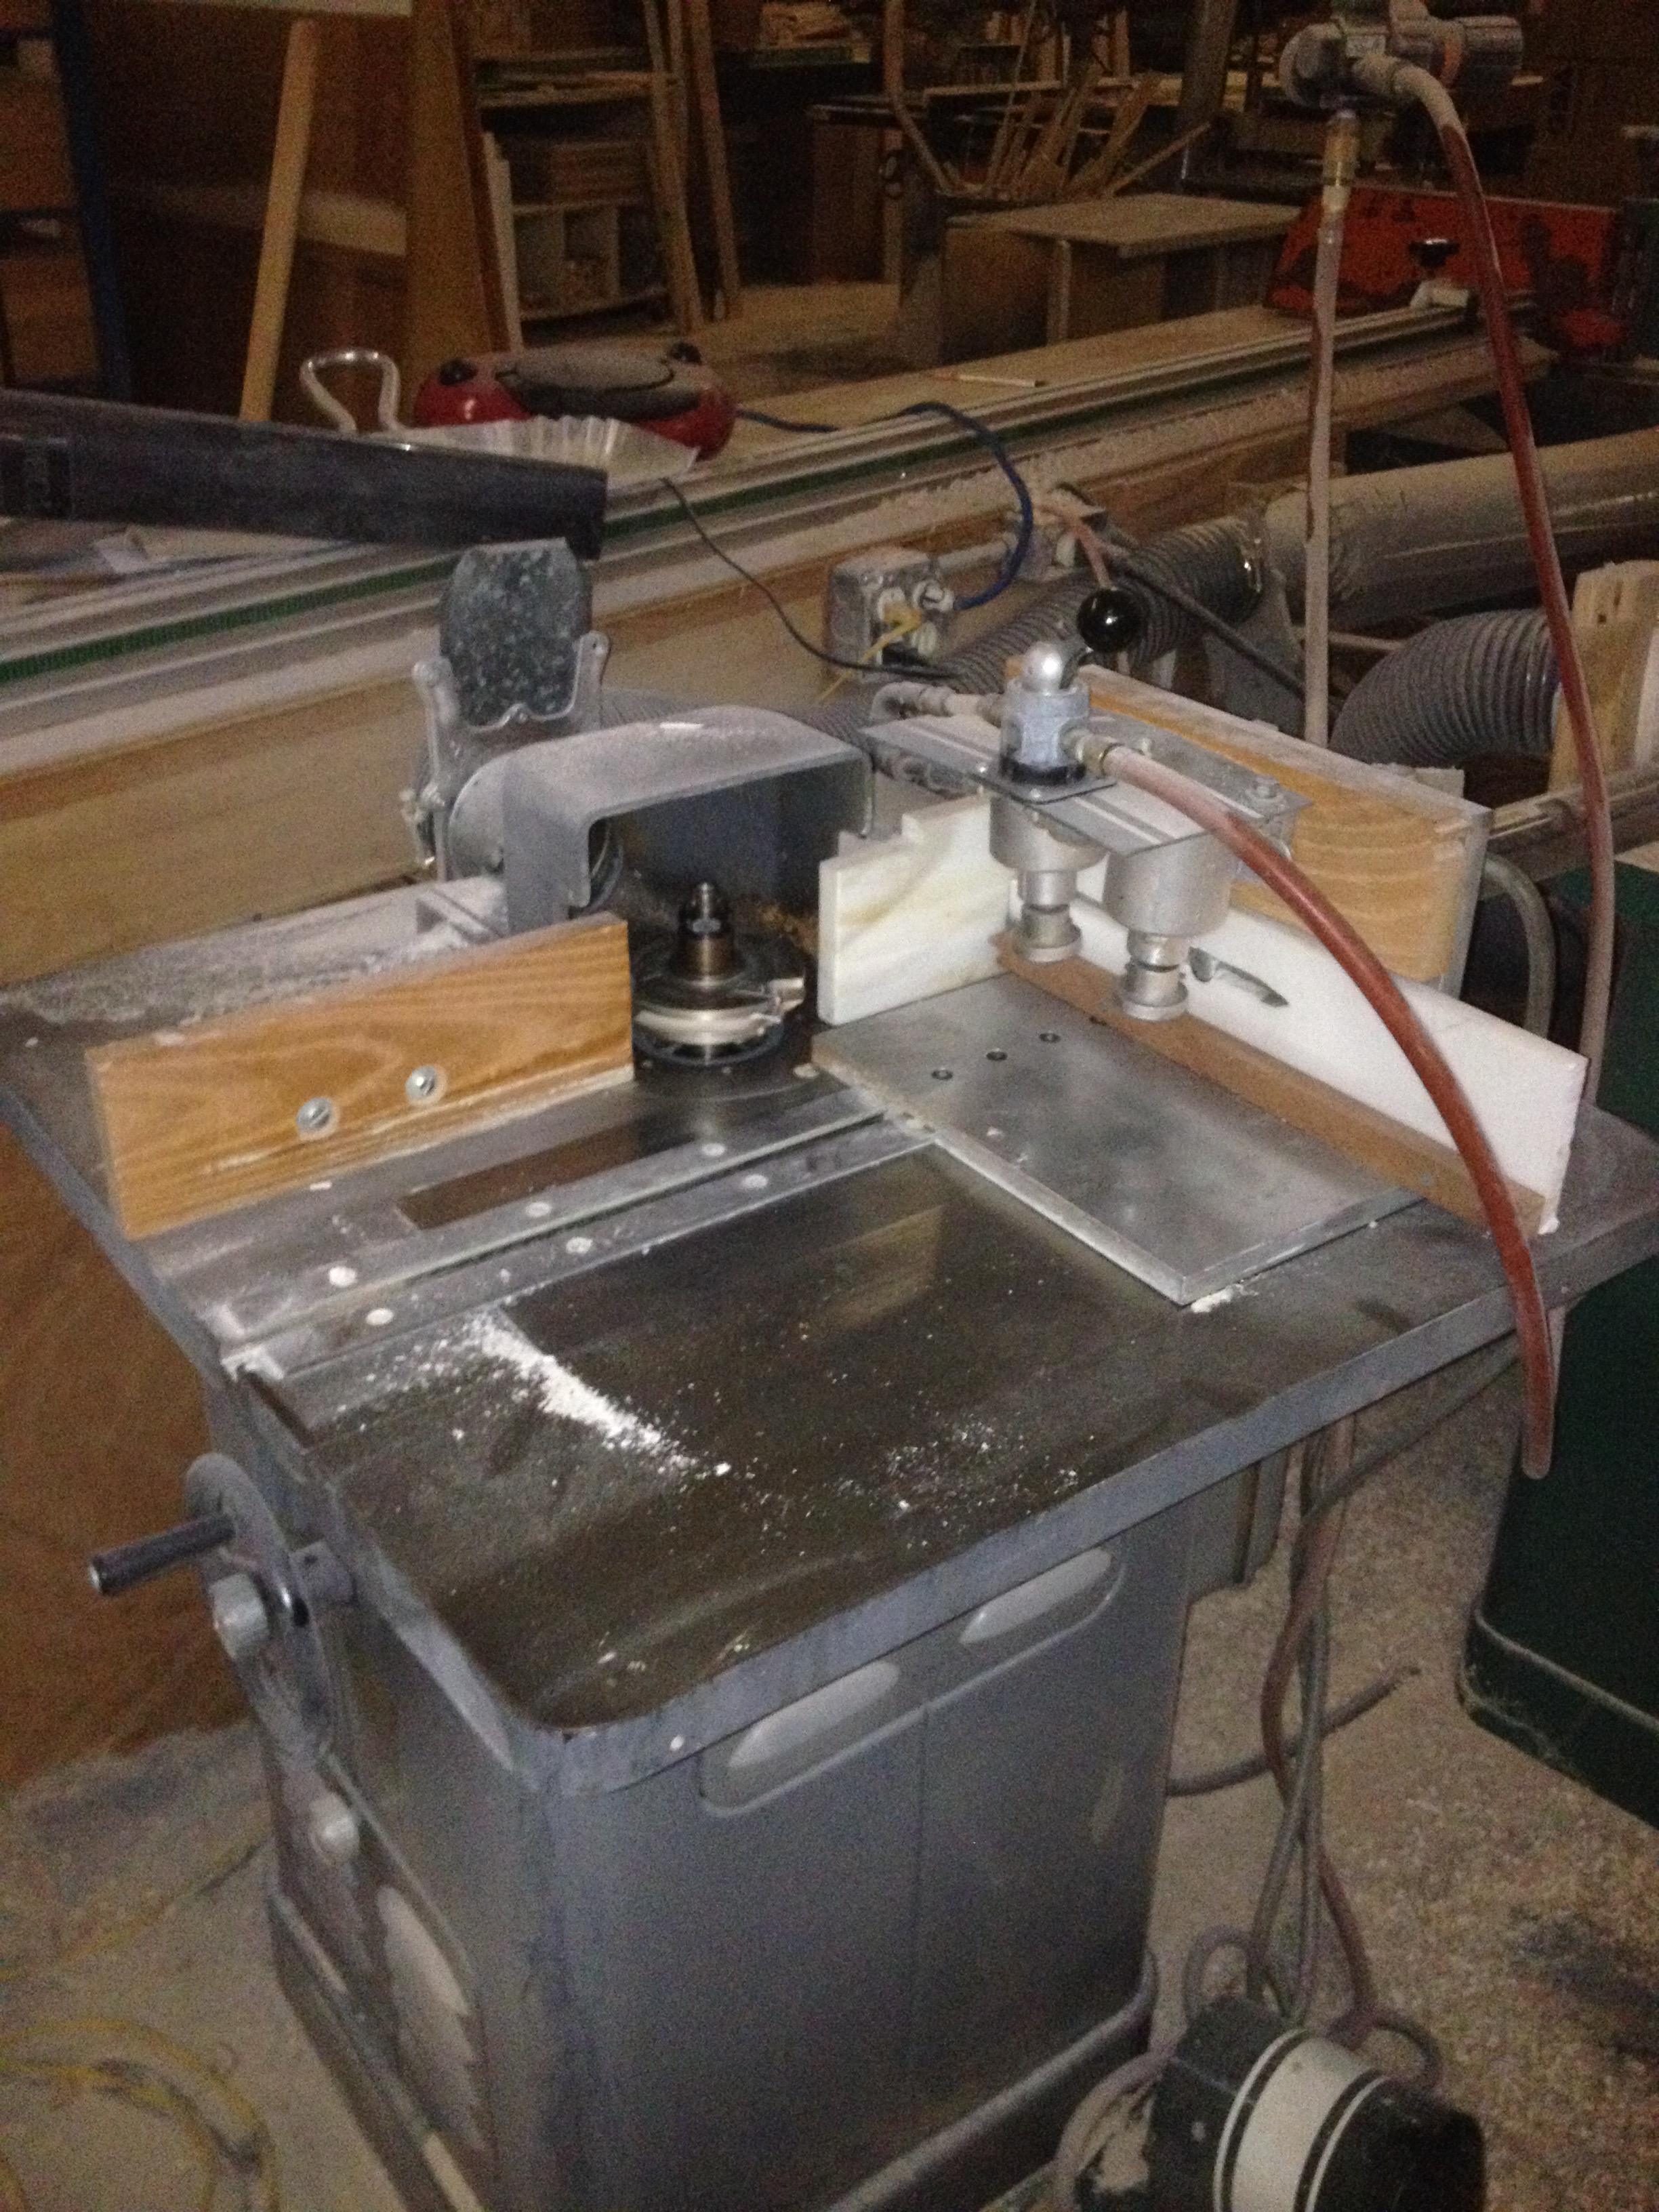
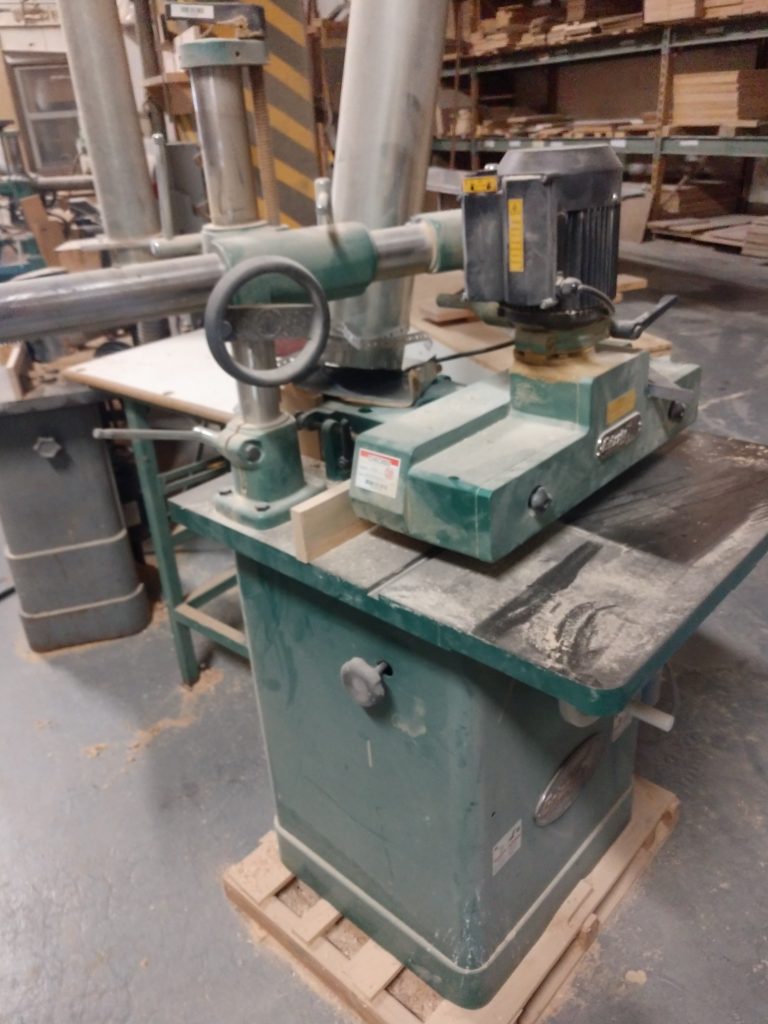
The other issue is the quality of the profiled edge. Routers have a very small cutting radius and the larger the cutting radius (the diameter of the tool) the smoother and cleaner the cut. A good shaper cutter might cost you $800.00 per head and it takes a large shaper to run large cutters to prevent vibration and poor quality cuts but coupled with a good track power feeder and you get really good quality edges. A rig like this costs around $8,000.00 so it is usually one of the last machines a shop can afford to purchase.
Routers will burn and splinter the wood and are hand held so you can’t climb cut. Climb cutting is actually running the wood the wrong direction and without a really good power feeder the wood is shot through the machine like an arrow and the wood and the cutter head is likely ruined. The climb cutting is used on the stick shaper (the female groove in the door joint) and you get a glass smooth cut. And the smoother the cut the more precise the cut leaving a tighter joint that has less glue and will cure out much, much stronger than doors made with a table saw or router.
Making Doors in the Shop
Making your own cabinet doors is expensive in time and investment. A lot of shops figure they can make another kitchen that week if they outsource the doors and the door companies are quite competitive on price. Rather than make the needed investment in machinery and skilled workers many shops will farm out their door production but is that wise?.
Why should a cabinet maker make their own doors?
- Better quality lumber used
- A shop can remake a door years later if needed
- A damaged door can be remade in hours not days
- If a door is questionable, you can make another one
But besides the quality issues, not a week goes by that some poor soul comes in trying to match a door from their home and no one has the cutters that match. If you keep the door production in house you will keep any old tooling if you upgrade and will always be able to match one of your old doors. You also have control over the wood used to make the doors and the door shops are notorious for trying to find bargain wood as it is their largest cost in a door. Better to buy your lumber from companies that you have done business with for years and don’t buy improperly dried wood.
Cabinet doors get handled a lot before the job is done and anything can and will happen. If a door or drawer front got measured wrong, manufactured wrong, or simply got dropped and damaged you will want a quick turnaround so the job isn’t held up over a missing door. Or during installation you find out that one wall is leaning so much that one of the cabinets must be remade to a smaller size. Or think about shipping delays because the door manufacturer is backed up or a shipment of doors is damaged in shipping. There are many reasons why competent cabinetmakers will invest in their own door equipment and not leave their customers at the mercy of another business. Our goal is to make the best cabinets in Oklahoma City and that starts with good quality doors make in our own shop and not contracted out to the cheapest bidder.
.

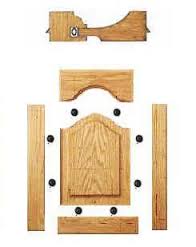
Raised Panel or Five Part Doors?
Raised panel doors have a 3/4″ thick center panel that is surrounded by the two rails (horizontal parts) and the two stiles (vertical parts). The raised panel rides in a groove that is part of the cope and stick joint that ties the corners of the door together. The different profile designs are covered in the raised panel cutter section below and above in the shapered door section. .
Five part doors have a center panel that is 1/4″ thick, almost always a double sided veneer MDF core panel for stability.
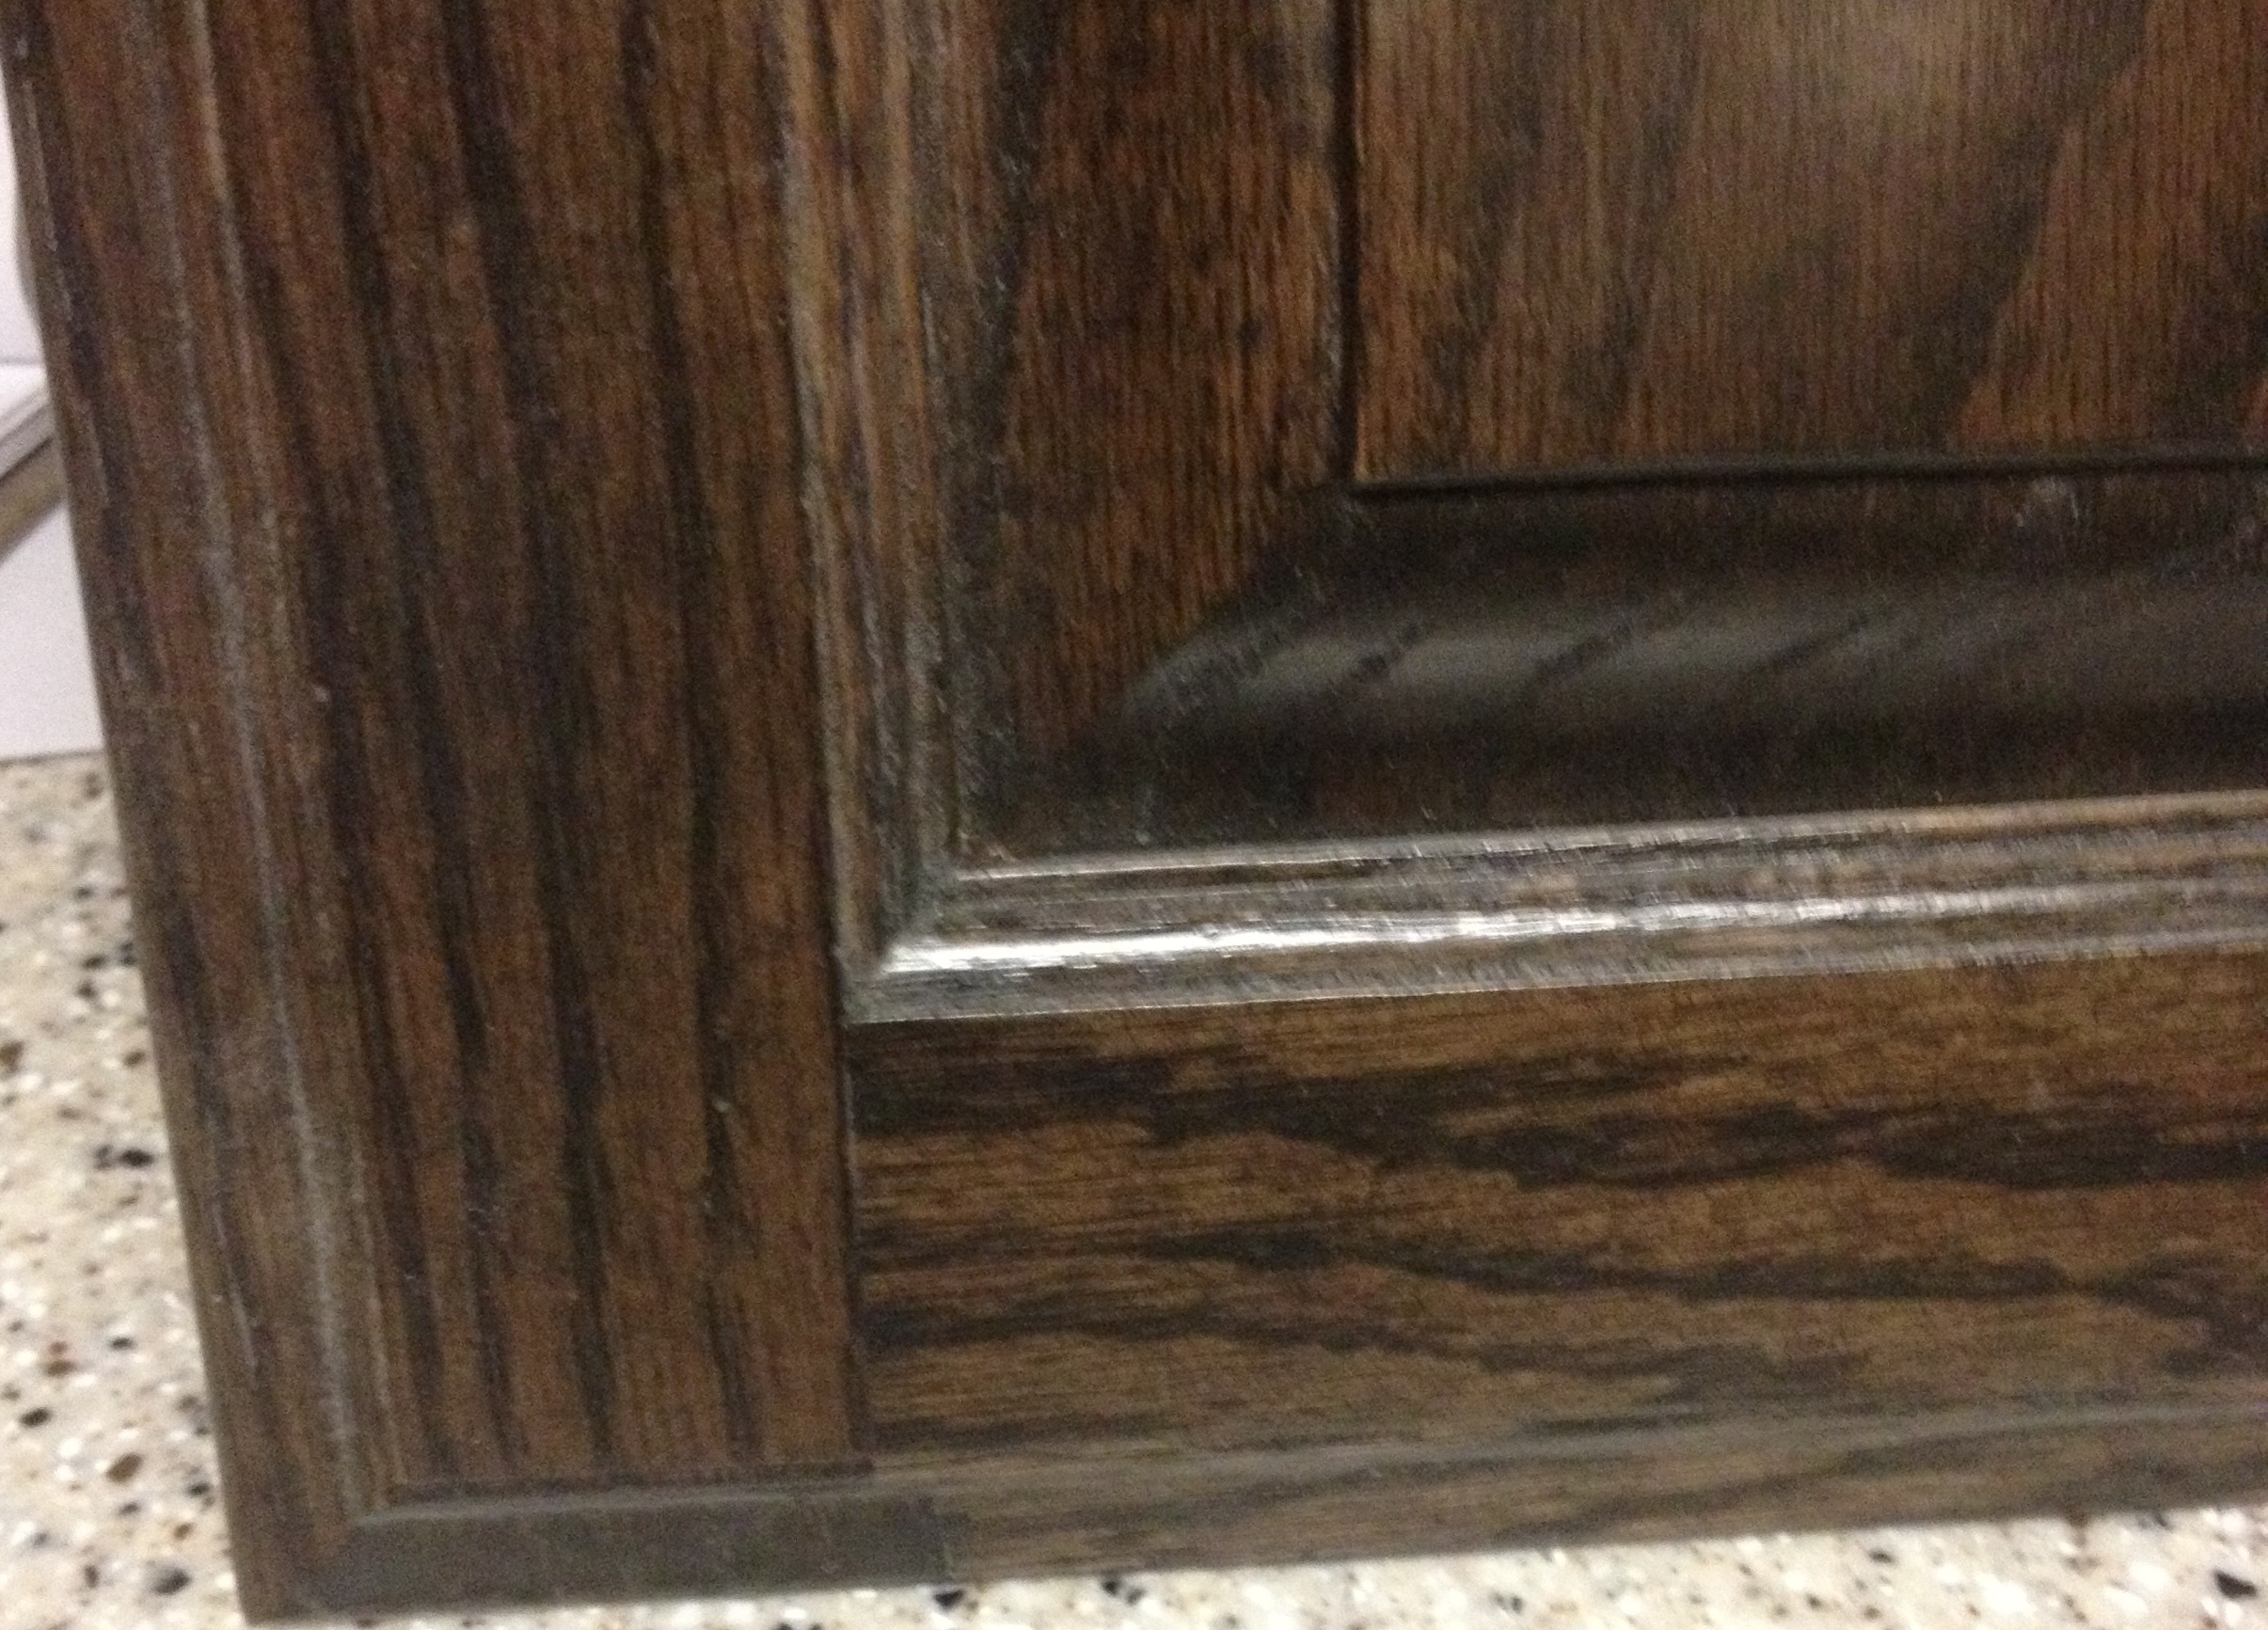
Can you turn the profile inside to have a shaker looking door?
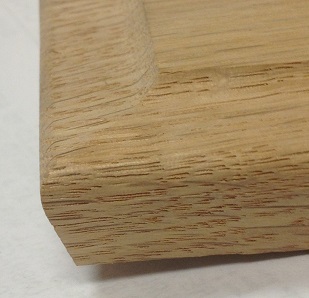
Yes, but there is no free lunch. The cope and stick profile is there for more than looking pretty; it removes the torn edge when the shaper cutter exits the back of the wood while making the cope or male portion of the joint on the end of the rails. The wood grain isn’t supported, even with a new wood block behind the door rail there will be some end splintering on the back side of the door rail.
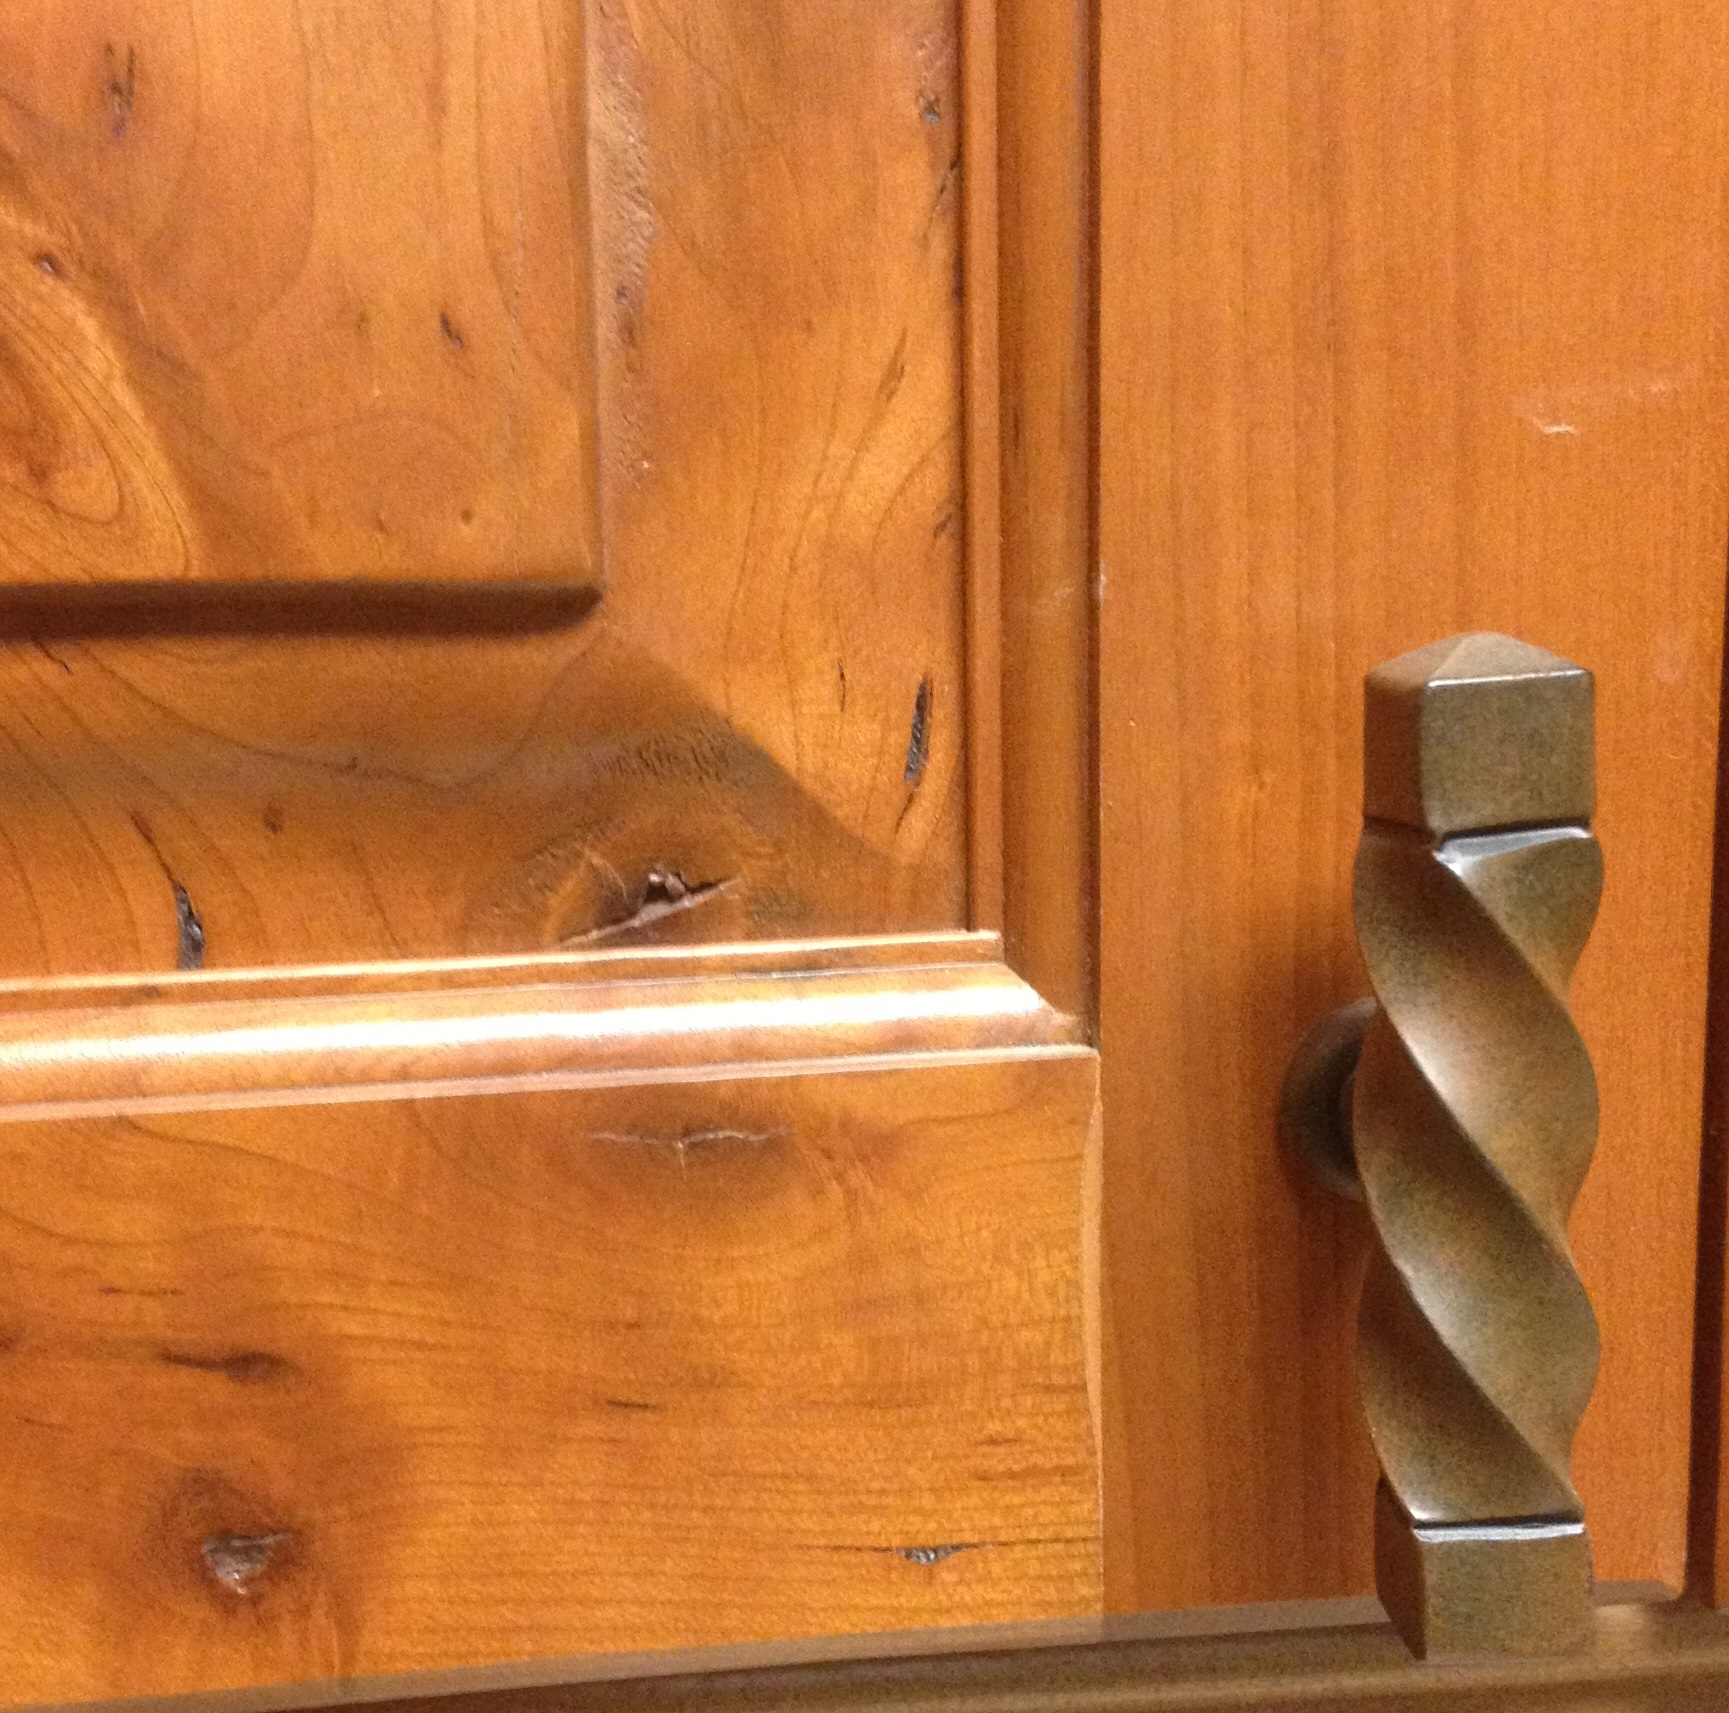
If you are on a tablet or lap top look to the left, see the small nick in the inside corner of the stile and rail junction? Doesn’t happen every time but enough times that it would be impossible or costly to just throw the part away if it chipped. Doesn’t putty well, even under paint. There simply isn’t any proper way to make a shaker door without this occurring. Yes, other companies make these doors and yes they don’t last as long as a good door because you have to biscuit or dowel the door joint. So yes you can turn them around if you aren’t super picky. You find kitchens that we have done with shaker doors but be forewarned, there are better doors.
Drawer fronts can be either slab, raised panel, or five part depending on size. The edge profiles are the same as on the doors so that everything matches. If you want the best edge profile cut quality keep the height over 6 3/16″ for a slab drawer front, other wise it is hard to get them through the door edge shaper.
What to consider in a door style?
- The costs on five part versus raised panels are usually about the same as the good two side 1/4″ plywood isn’t cheap
- Do you cook a lot? The less complex the profile the easier to keep clean
- How ornate or simple is the look you are going for?
- Want to tie a remodeled kitchen into the other trim?
On raised panel drawer fronts the width of the raised panel needs to be wider than about eight inches for best quality as the raised panels are hand fed through the shaper. Narrower than that causes the wood part to rock around or jiggle going through, putting a corresponding jiggle in the raised panel profile. Raised panel fronts also need to be a minimum of 9″ wide in order to glue up in our door clamp and the stiles (vertical) will run up and down on the finished drawer panel. It is quite dangerous to run a door rail (horizontal part) less than about 5″ long too so there is a limit on all raised panel doors and drawer fronts as the rails need to be 5″ or more.
Mixing drawer front styles
You can mix slab drawer fronts with the other styles and they look fine. On a typical three drawer bank in a kitchen you will have a 6 3/16″ tall upper slab drawer front, an 11 1/4″ tall center drawer front, and a 12 1/2″ tall bottom drawer front. It looks fine to use all three sizes as slab drawer fronts or make the larger two raised panel or five part. The same goes with doors under 9″, use a slab door, not a five part or raised panel or re do the design to eliminate the narrow doors.
If you are unsure how this will look start looking around at kitchen pictures online. You will find plenty, probably the majority, of kitchens done with mixed drawer fronts.
How about those neat looking mitered doors?
Ahhhhgggg! Warning, you have been exposed to kitchen pornography! See the second section below to find out why mitered doors are the Spawn of Satan to competent cabinetmakers. Till you read the section on mitered doors hide your checkbook from yourself.
Yeah, a lot of Oklahoma City cabinet showrooms have mitered doors but check their warranty, usually the minimum one year warranty compared to our policy of “if you have a problem, we have a problem.” You can get away with just about anything if you don’t care how long the product lasts.

Raised Panel Profile Choices
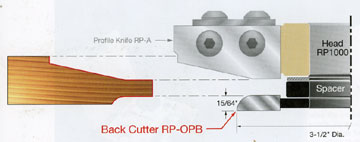
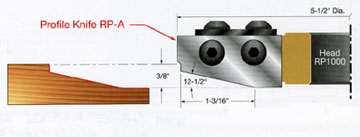
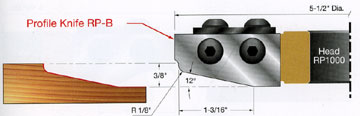
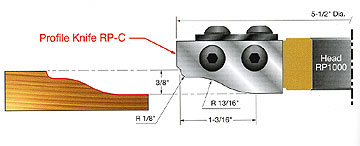
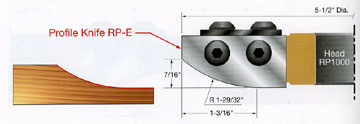
Raised Panel cutters are more diverse. We have five styles available which will cover most tastes. This is an insert style shaper cutter so the blades are easy to swap out.
The cutters to the right are the raised panel cutters, A, B, C, D, and E and a back cutter that is used on all of the types.
The most commonly used is the D profile as it has a sharp inner corner that is great for glaze finishes and a sharp corner shows up much better than the gently rounded inside corners on some of the other profiles.
Raised panels are cut face side up and hand fed because
there are a lot of narrow raised panels. If a door is only 9″ wide, that makes the raised panel only 4 5/8″ wide after subtracting for stiles and space ball clearance. Narrow parts like this are difficult to get through the shaper without jiggling the panel and making a corresponding dip in the finished panel so narrow raised panels are always a bit less quality than bigger raised panels. Many companies refuse to make a door less than 12″ wide (7 5/8″ raised panel) to get around this but we prefer to have the option to give up a little quality of cut in order to have narrow doors instead of slab door panels.
What to consider in a door profile?
- Are you going to glaze? Sharp profiles are needed
- Do you cook a lot? The less profile the easier to clean
- How ornate or simple is the look you are going for?
- Want to tie a remodeled kitchen into the other trim?
Our door edge profiles are small in number but few people want more than our standard profile. These shaper profiles are insert type so they are fairly quick to change out if you want other styles. Door edge shaping straightens out the edge of the doors and make the edges smooth and square, ends are ran through first because they will chip on the following edge as the grain isn’t supported and you are cutting cross grain. Then the sides are run, sometimes twice or more to remove any chipping from the end runs. Of course the second run leaves the door 1/16″ smaller than planned which is why in the industry doors have a tolerance of plus or minus 1/16″
Eased edges are sanded instead of using a router to minimize chipping and doors being ruined by the small radius router cutter. However we put door edges on for a reason, it hides small inaccuracies in the adjoining doors and drawer fronts lining up. A square edge or eased edge requires a lot of work to tweak and perfection is expensive and time consuming to achieve so expect to pay a premium for flat eased edge doors. We charge $20.00 per door/drawer front for square edge doors.
Most shops will have only one cope and stick cutter set as the set up and tear down is quite time consuming and the shaper cutters are expensive.. Door shops might have two types.Our cope and stick is to the left if you are viewing this on a laptop or desktop computer. This is basically a tongue and groove joint with 1/2″ tenon that is exposed on the ends of the doors. Can the profiled part be faced inside the cabinet? Yes it can but the sticking shaper cutter will knock off one corner of one end on many of the rails and this must either be puttied which isn’t going to look perfect or you just have to live with the two inner corners of the door being less than perfect. The companies that do produce a true shaker door style aren’t making very sturdy doors in our opinion.

Kitchen Pornography and Mitered Doors
Kitchen pornography is a term in our industry for silly things that companies market and people buy that are not of the real world. These products are like porn, fake, not going to last, not something you would take home to meet mom and dad… Well at least not mom. These are products that might be exciting and cool in the heat of the moment but really you are going to regret getting involved in the entire mess .
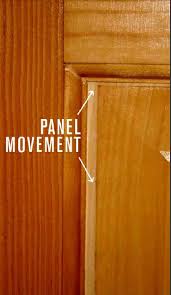
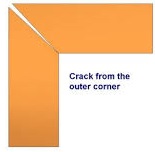
Mitered doors crack whether they are painted or stained and more that cracking the finish, they crack the joint apart over time. The perfect controlled obsolescence product as you know that wood is going to shrink and swell no matter how well it is finished
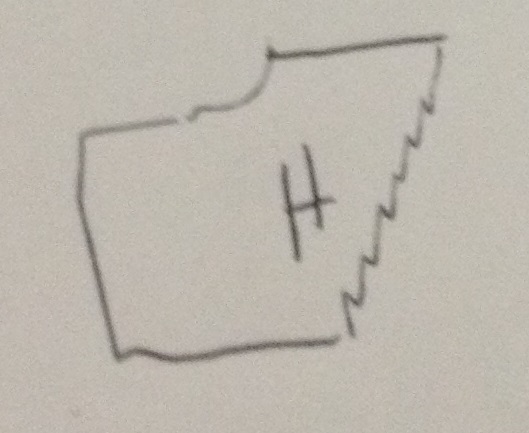
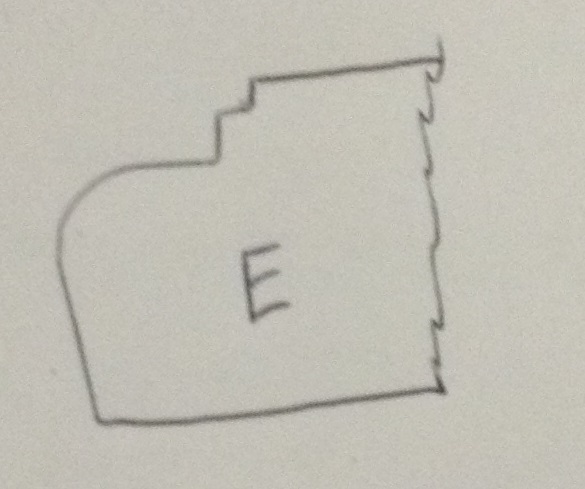
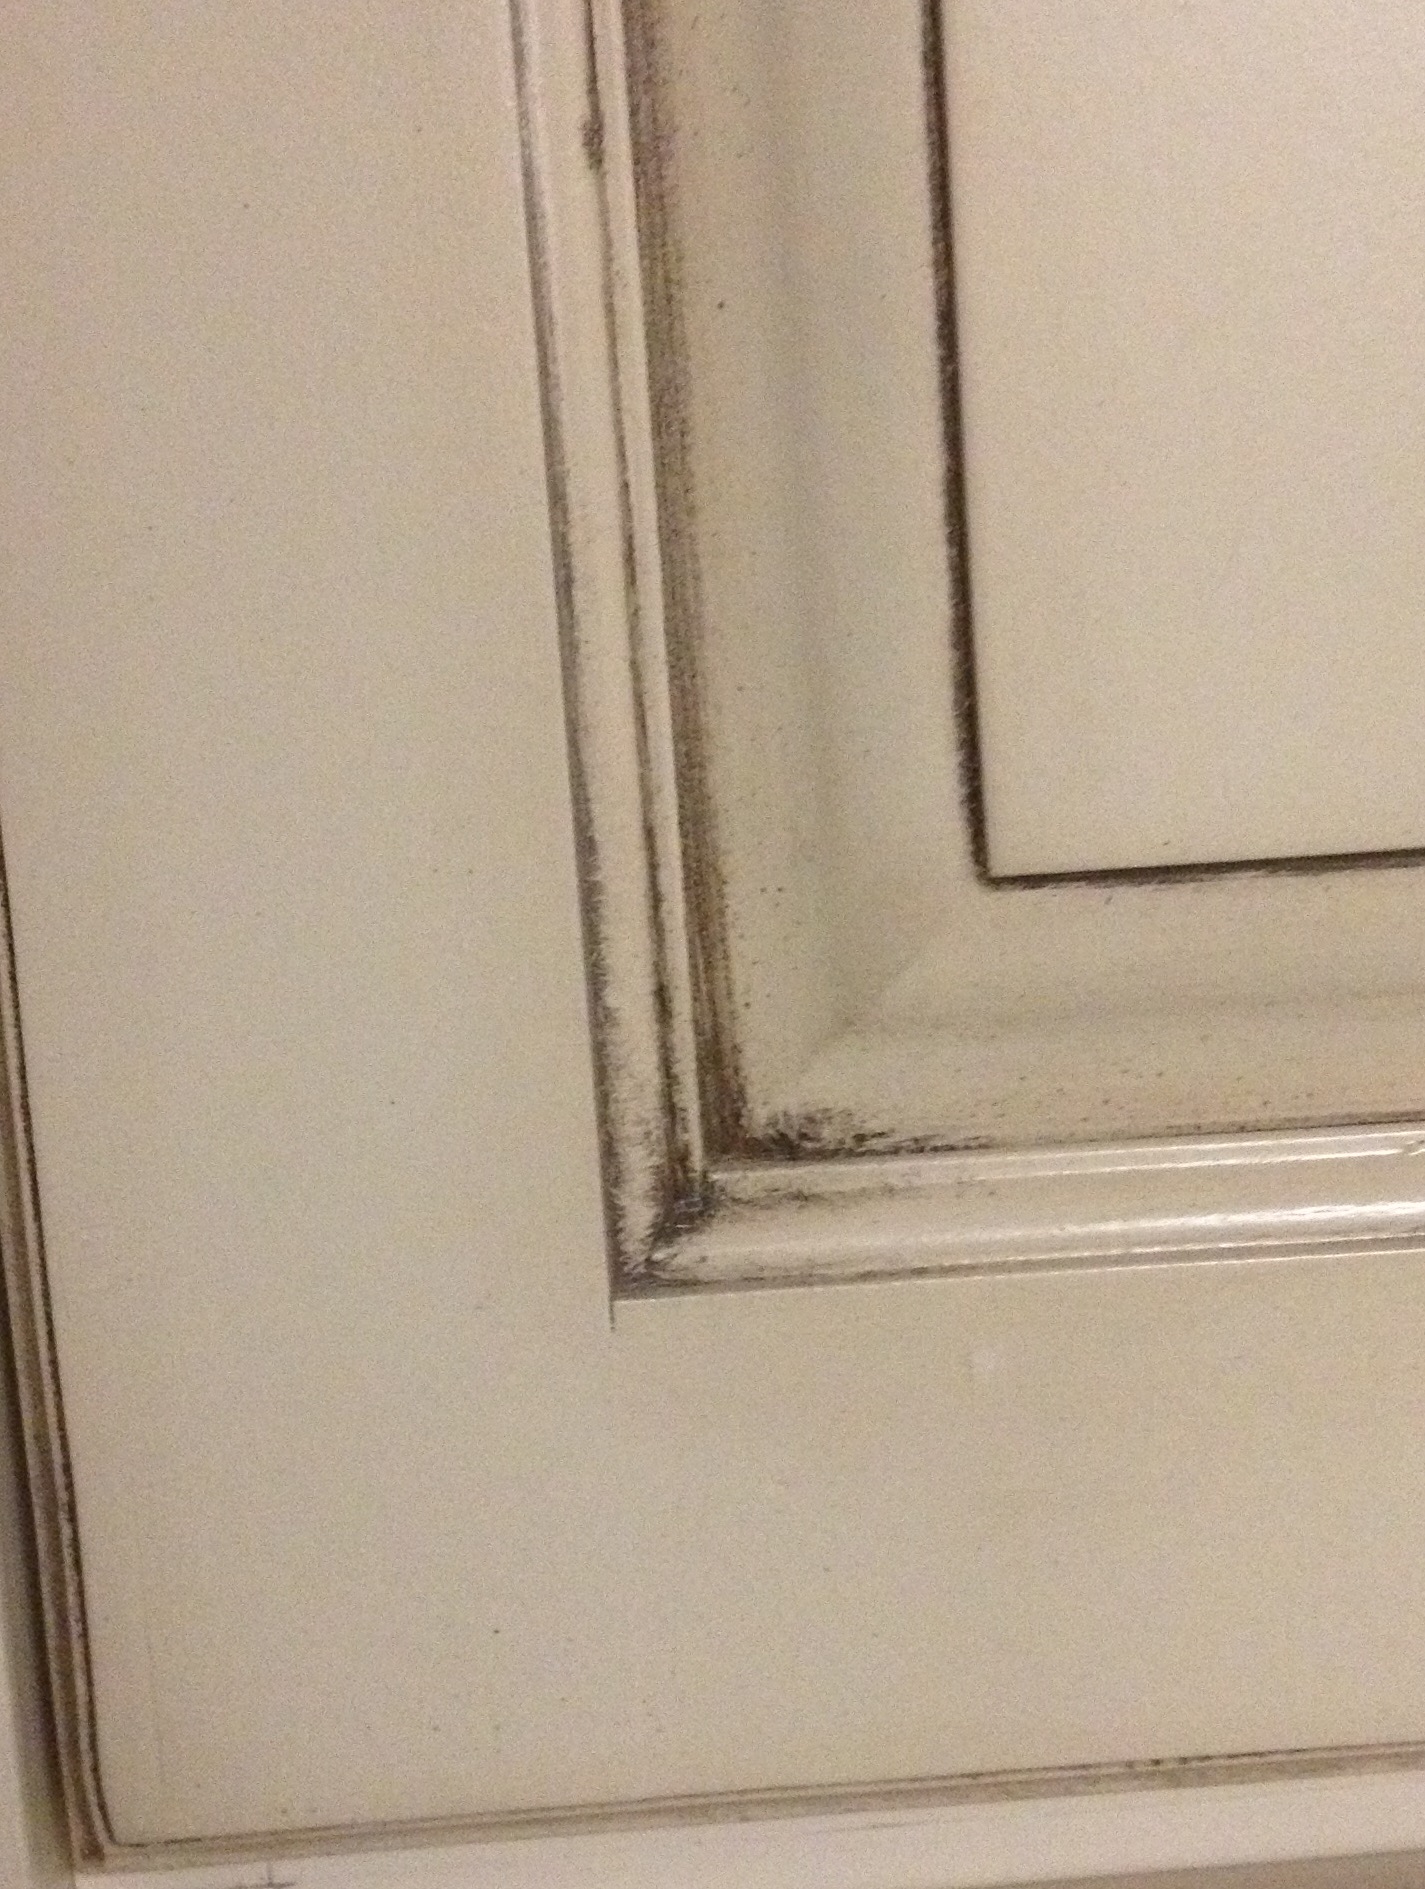
At the top left it shows what happens when mitered cabinet door moldings swell with humidity changes in your home. The width of the stiles and rails changes so naturally the tip of the miters grow apart. The drawing below shows what happens when the molding shrinks as the air dries out during winter. The width of the moldings decrease in size so the inside corner gaps. Heat, even sunlight can warm the wood and drive off moisture and cause the cracking.
Yes, the pre made kitchen cabinet salesman at the Oklahoma City warehouse is going to make more commission if he pawns this junk off but keep reading to see exactly why we refuse to do mitered doors. And yeah, it is cracking, cracking the paint, cracking any glue that might have been in the joint when it was assembling, and the two wood parts are sliding past each other, first one way, then another, till all you have holding the door is a friction fit.
Mitered doors will likely hold together for a few years so if you just have to go that route budget some cash every five years or so and replace the doors.
Why are mitered doors the road to hell for a kitchen?
- They are going to crack and look shoddy
- They eventually will fall apart
- Most mitered door suppliers will warn you and make you sign a waiver covering what will happen
- There is no joint, not fastener, no amount of stub tennon, that is going to prevent these cracks from happening to every corner of every door
- Industry standard is 0.10 of an inch gap considered not a defect. Click on this link, one click down under mitered door info to see this company’s standards. That is one tenth of an inch!
Yeah they are striking, unusual, and impressive. Just remember that Al Bundy in Married with Children thought the same things about the ladies in his monthly issue of “Big Uns” magazine..
Mitered doors started off as a way to allow particle board and thermofoil MDF doors to be made quickly. Great idea, run a bunch of molding, cover it with vinyl film or thermofoil, chop it at 45 degree angles and biscuit or dowel it together. No unwrapped ends showing, much tighter crevices and moldings could be done than were possible with the vacuum wrapped doors. And you could use cheap labor. And particle board doesn’t expand much at all.
Good enough for the mobile home industry but some yahoo got the idea of using solid wood moldings. If you have ever done any remodeling or trim work you know to warn the homeowner NOT to turn the heat up to dry out the fresh drywall compound. The door casings will shrink and look like a drunken Oklahoma State Senator installed them the day after he was forced to resign for harassing his secretary.
Cope and stick doors will eventually have some hairline cracks in the finish too but will never gap like a mitered door will gap and while there is one side of the coped joint moving a few hundredths of an inch at least both sides aren’t moving so the shrinking and swelling is not going to destroy the door. Red oak seems to be the least likely to develop these hairline cracks and maple the most likely.
Why Are Shaker Doors More Expensive?
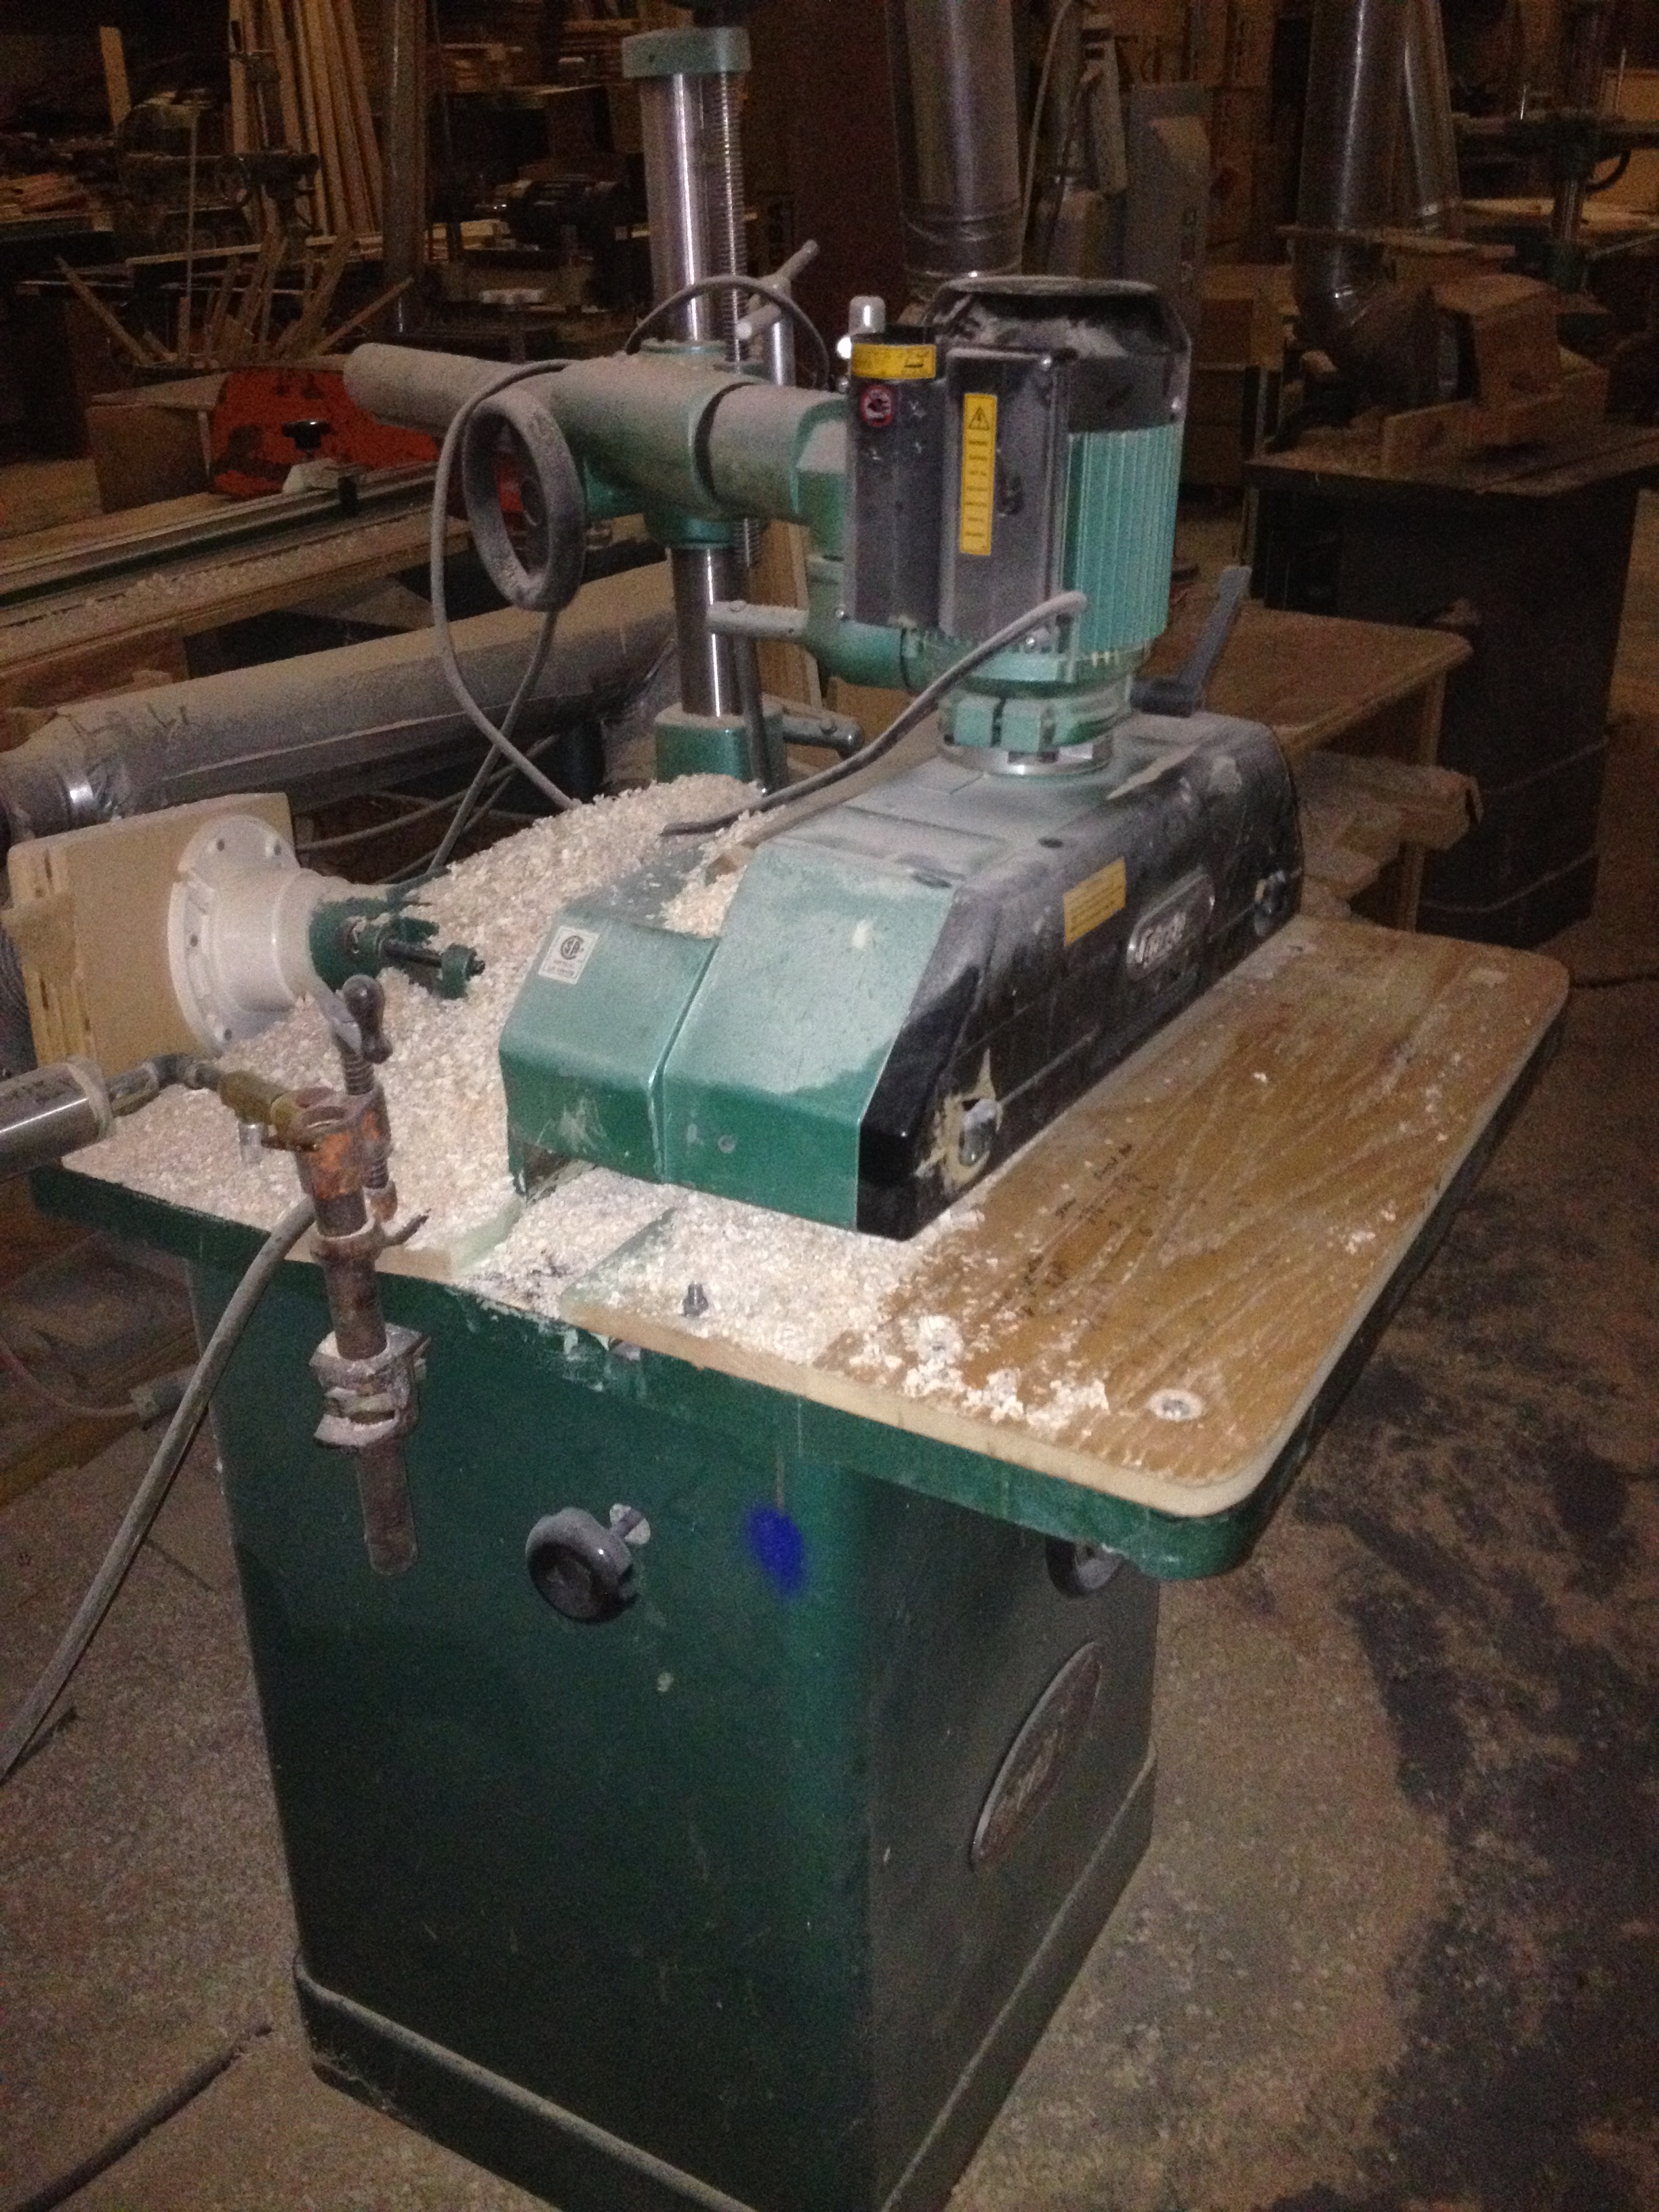
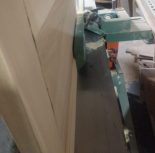
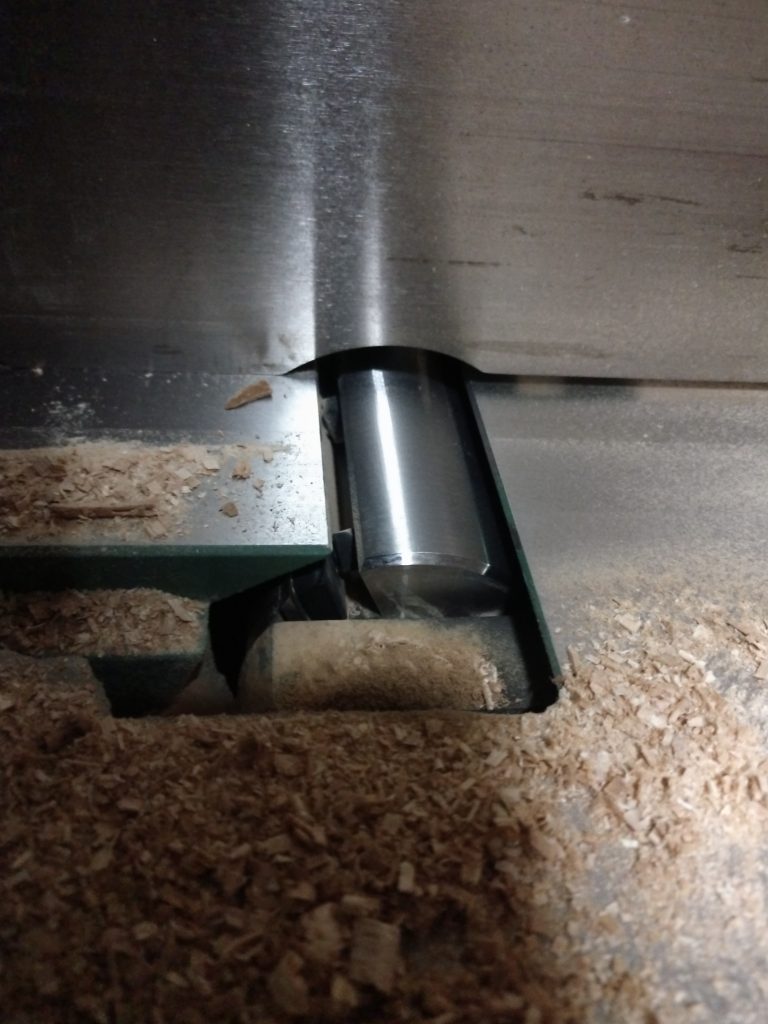
Above is a picture of a jointer used to square up and clean up the sawn edge of a door.
If you are on a laptop or desktop computer, up in the far left hand upper corner is a small picture of the other side of the machine, showing a short 4″ tall vertical fence that the door is held against while running the door across the cutter head. Small doors, no problem, bigger doors, big problem. It is difficult to keep the door vertical and moving at a steady rate so that the door edge is straight and square. Note that the door has a thinner inside panel. When you first start you have the rail standing up against the side fence but soon the rail is past the end of the vertical fence and it is even harder to keep that door straight and square. Then the other rail is coming straight into the starting end of the vertical fence and it just might snag and stop the progress of the door and cause a mark/divot in the finished edge.
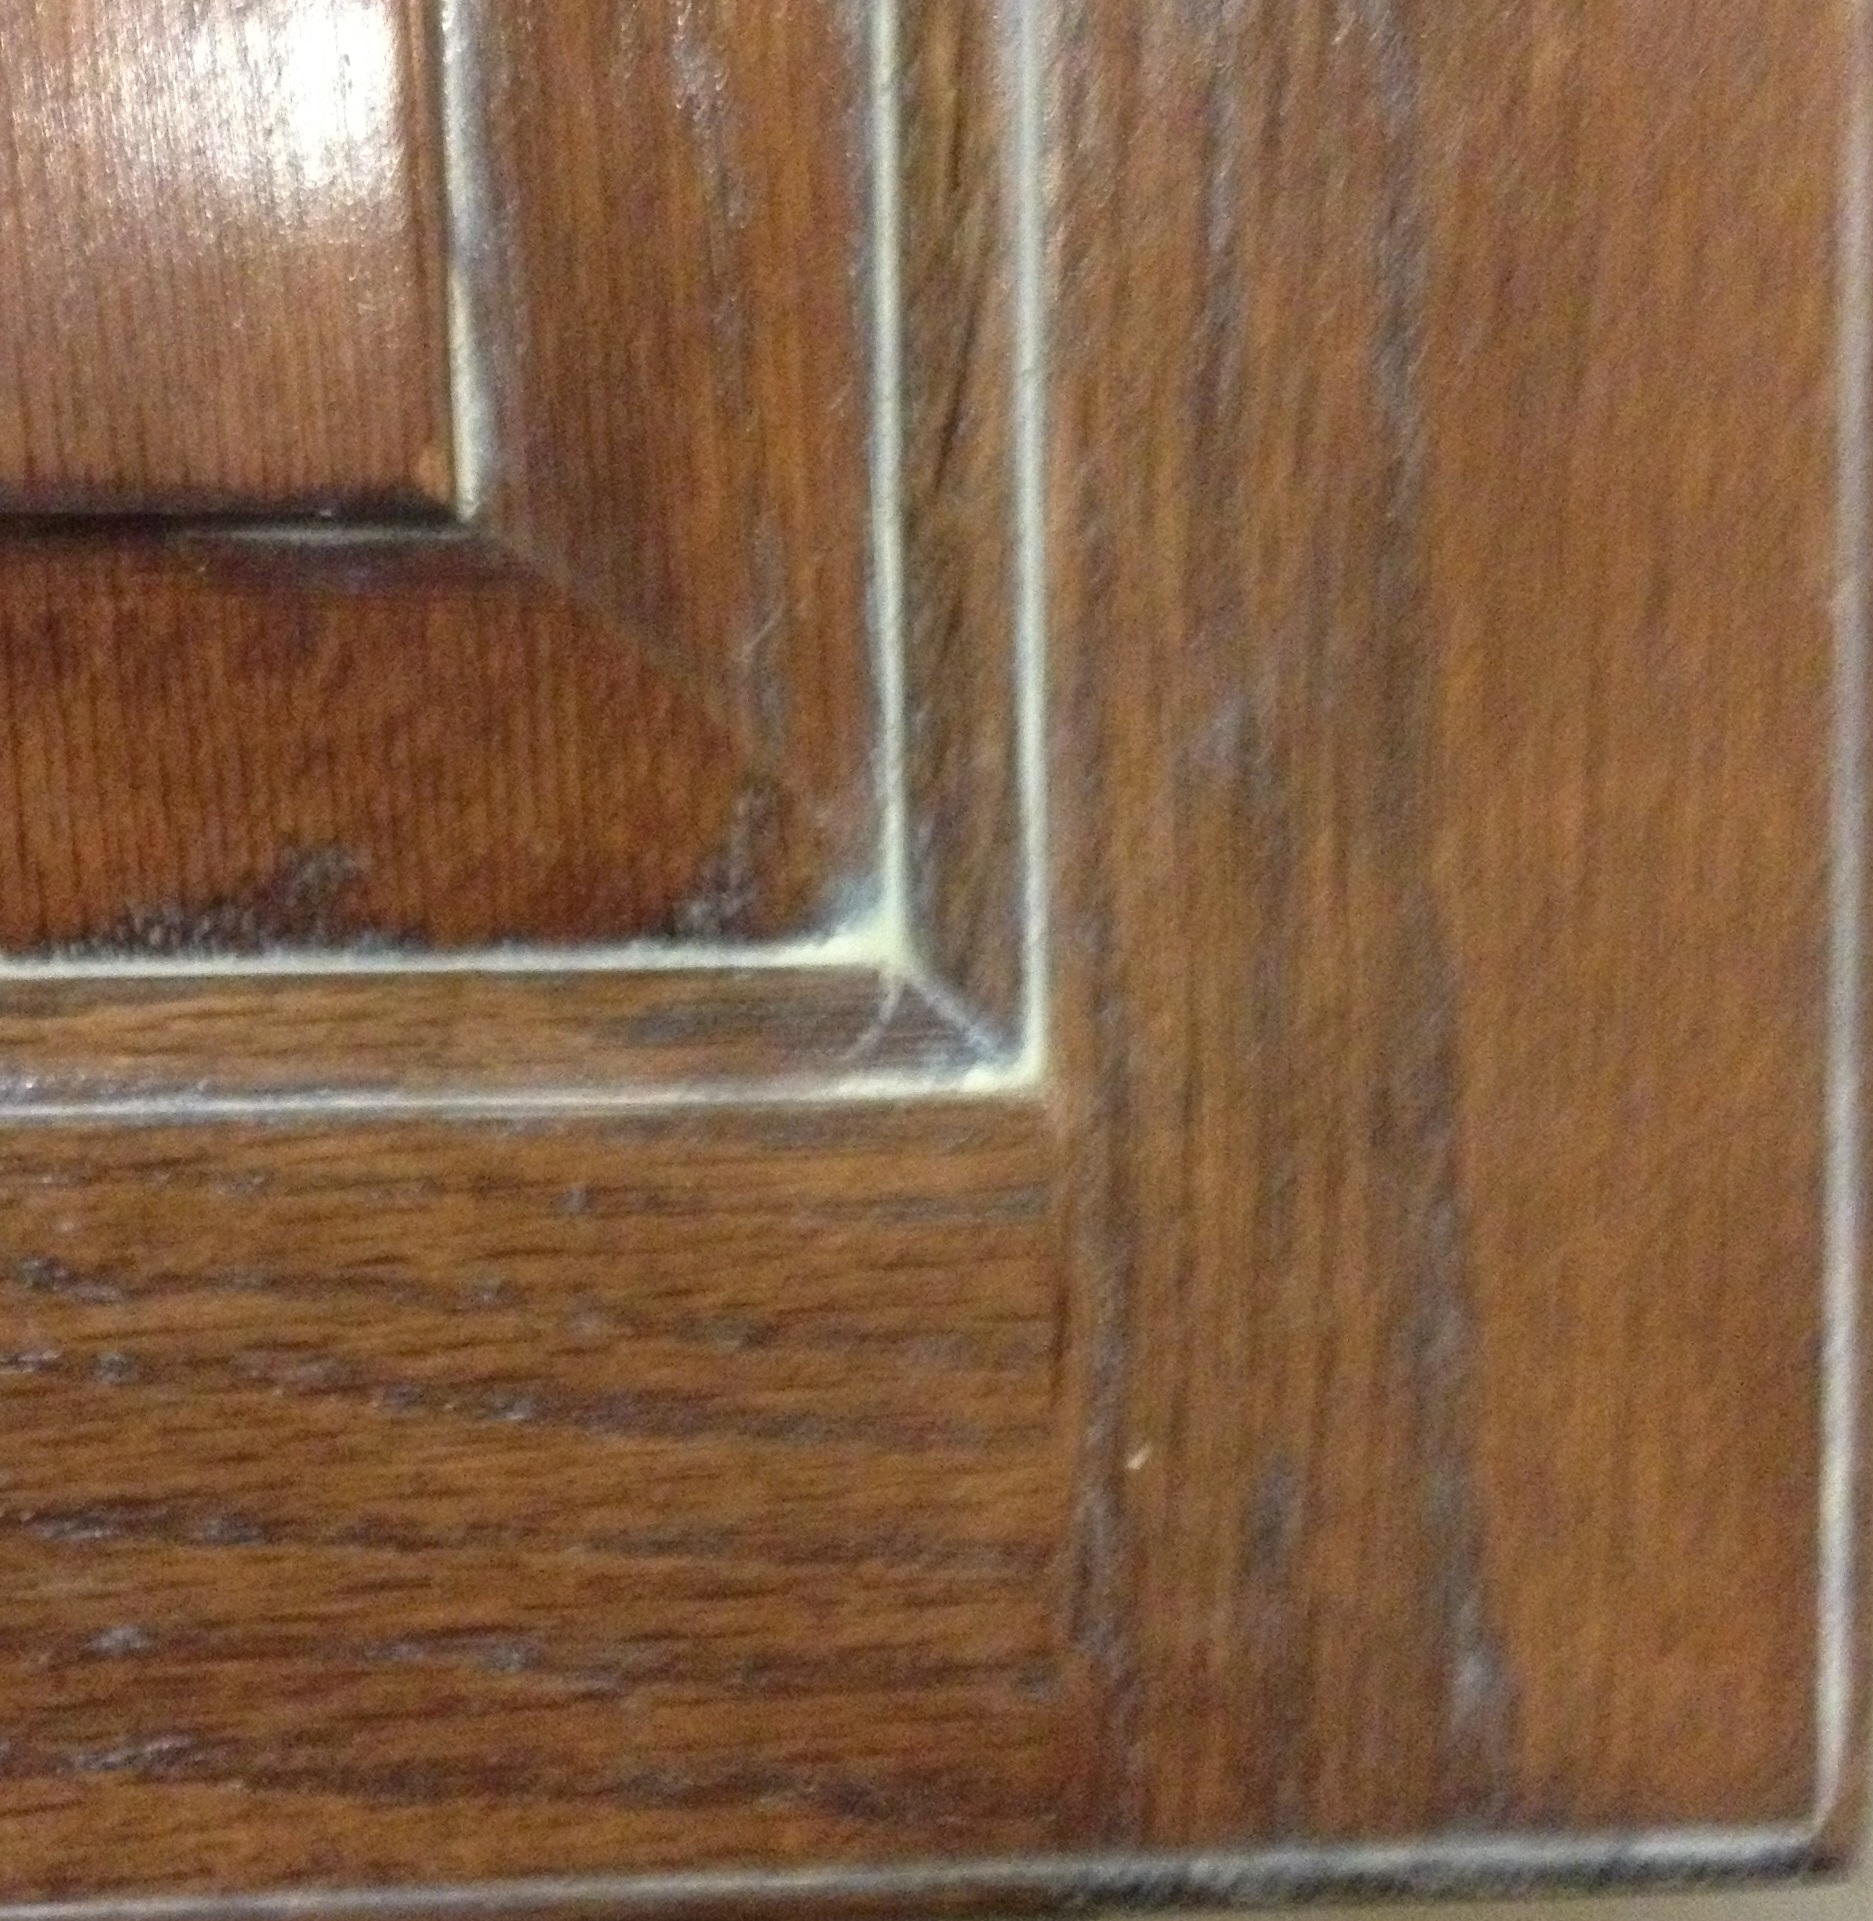
At the left are two pictures of the damage done by the coping process on the end of each door rail. The damage will be on both ends 80% of the time, on diagonal ends of course as you flip the part and run the cope on the end of the rail. Normally this is not a problem as the sticking cut that puts the female part of the joint on the door rail edge takes off this damage as seen in the bottom picture of the double sided mid stile. Of course in a regular single panel door the sticking (female part of the door joint) is ran on only one side but the shapering of the four edges of the door cleans up the coping end damage and any glue on the ends of the door.
Then there is the cost of labor. The industrial duty shaper can run all four edges of a good size door in about 45 seconds, removing a 1/16″ off each side and leaving a very clean and smooth cut on all but the more irregular grain woods. And the door edges is done. On a shaker door, the jointing needs two passes and before running the part you have to look at the wood grain and guess which way to turn the part for the least amount of chipping, eight passes instead of two passes on the shaper. Then you have to hand router an edge on the door and the cut quality is even worse as the router diameter is quite small, under a half inch! Lots of tear out and chipping to try to putty and repair and sand out. Figure a good 20 minutes per door to do what takes only 45 seconds to do much, much, much better on a shaper. Charging $20.00 per door/drawer front is a bargain and it is still a poorer quality door in the end. In the end, a shaker style door is more expensive and much poorer quality than a well made shaper edge five part door.
Then there is the diameter of the cutters used
- Jointer cutters are a couple inches in diameter
- Shaper cutters are much larger, up to 6″ diameter
- The larger diameter the cutter the smoother the cut
- Shapers also are ran much faster in RPM resulting in a much cleaner finish cut
- Shapers also have expensive power feeders that clamp the door tight to the table and evenly feed the wood past the shaper cutter, resulting in the best possible quality cut
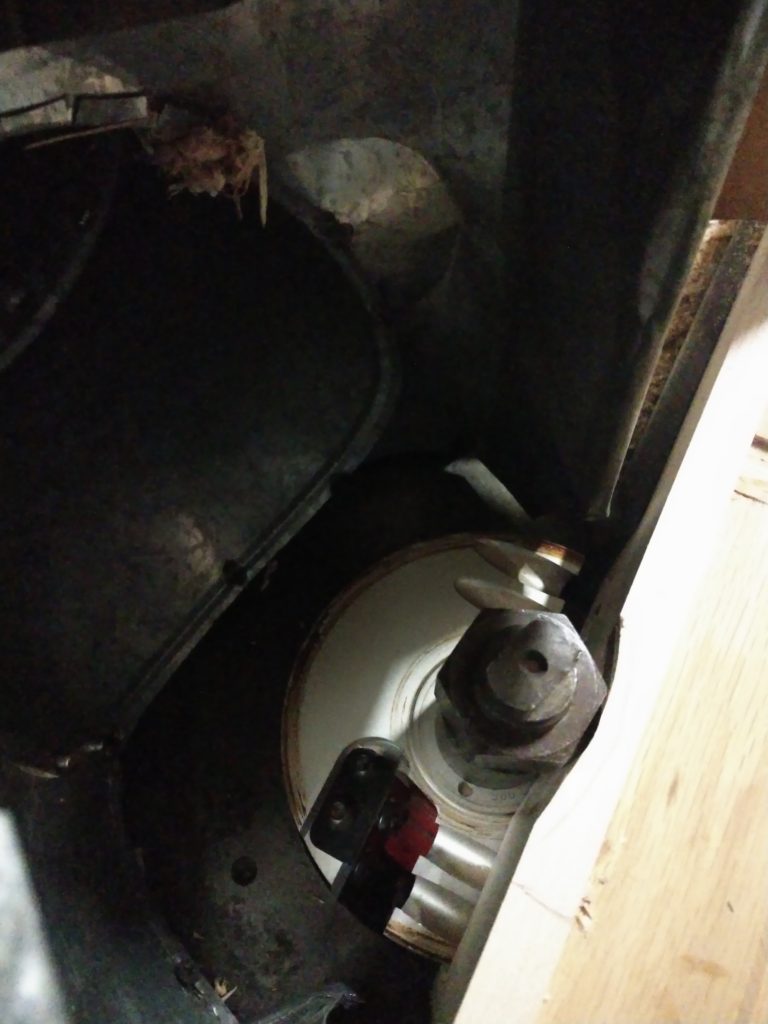 6″ diameter shaper cutter for making raised panels, much smoother cut than a 2″ diameter jointer cutter.
Wood Species for Cabinets
Sure, there are many species available but these are the suitable species for cabinets. Lets look at the good ones before we look at why the others don’t make good cabinets.
On anything but soft maple, red oak, and cherry expect to find moldings expensive and/or unavailable. Crown molding on those species is available and on other species we can make 5″ crown molding or a flat faced 5″ crown. We have a molder that can do some popular moldings such as quarter round and cove molding and quite a few custom knives that we have bought over the years.
Specialty items such as corbels and turned posts are also a bit more restricted in woods other than red oak, maple, and cherry. When other species are available expect to pay much more as they are slow sellers and bring a premium price to be custom made.
Wood Species for the Cabinet Exterior
- Red Oak
- Soft Maple
- Cherry
- Sapele
- White Oak
Cabinets ought to last the life of the home or at least until the homeowner wants a fresh look. Usually the problem is that something faddish was used in the kitchen design or the cabinets and finish didn’t hold up well, both of those an be avoided by choosing wisely.
So we are going to need a wood that is stable and durable, pretty but dense enough that fasteners don’t wallow out the wood they are fastened into, and the wood has to hold paint well or be able to be stained out the color that is desired. Staining wood is not what most people think, the wood will accept so much stain and no more and extra coats aren’t going to help or they will cause problems with finishing.
We want a wood that machines well without a lot of tearing or splintering, a wood that bugs and beetles won’t attack, and we need to be able to find moldings and trim at a reasonable cost. We will need matching plywood or MDF core veneered sheets of the right thickness and quality needs to be available


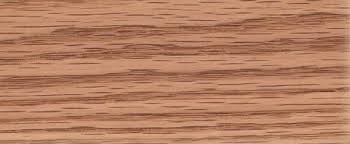
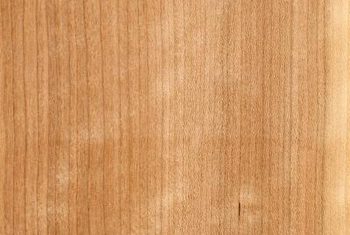
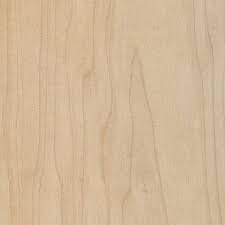
Red Oak
A wonderful wood to work with. Mostly straight grained and strong. Door joints in red oak are probably the best at staying flat under lacquer paint. Mostly uniform in color, some mineral streaking, but it stains out very uniform unlike maple. All trees have tapered trunks so the grain tends to run out on once side but with red oak you can usually just look at it and know which way to turn it around for the best planning or sanding. Slightly cheaper than soft maple.
Red oak is great for using under painted finishes where you want a lot of glaze to highlight the grain. On a tight gran wood like soft maple the only place for glaze is in cracks and crevices where the glaze will be protected as the top coats won’t burn through the glaze and gain a solid attachment.
Red Oak
- Uniform and fairly straight grained
- Machines and sands well
- Stable and commonly available
- Reasonably priced
- Hard and dense, holds fasteners well
- Stains well, reddish tint can be toned down
Cabinets ought to last the life of the home or at least until the homeowner wants a fresh look. Usually the problem is that something faddish was used in the kitchen design or the cabinets and finish didn’t hold up well, both of those an be avoided by choosing wisely.
There are several types of red oak depending on how the log was sawn. Rift sawn stains darker as it has more of the pores. Quarter sawn has the distinct look of quarter sawn but stains much lighter. Rift sawn is an economical version of quarter sawn. Regular flat sawn red oak is fairly straight grained while rotary cut red oak plywood veneer is pretty wild looking.
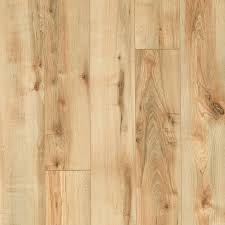
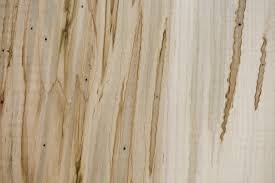

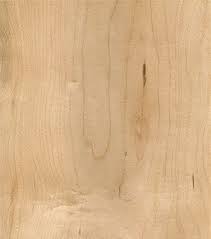
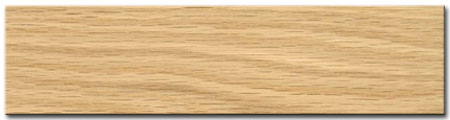
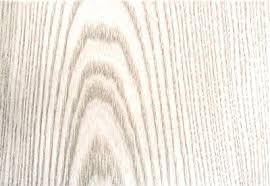
Soft Maple
Great for paint grade, not so good for stain grade unless you go with a very light stain or pay for a select or white maple. Heart wood will be darker, beige to even gray. Sapwood will be more white. Grain on soft maple is very twisty and interlocked so it doesn’t plane or sand as well as a straight grained wood like red oak. There is very little true soft maple plywood available, birch is usually substituted for soft maple. The term soft maple actually encompasses hundreds of varieties of maple so there is a lot of variation in the wood.
Rustic maple can have as many or as few defects as you wish, all we really do is cut out what the customer doesn’t want so a little more waste factor or less lumber yield. The trick is making sure you leave the knot, split, or defect in a place where it doesn’t endanger the strength of the cabinet or it won’t interfere with hardware or fasteners.
Soft Maple
- Medium priced, the best paint grade wood
- Machines and sands well
- Stable and commonly available
- Good for light finishes
- Hard and dense, holds fasteners well
- Stains blotchy due to interlocking grain
White maple, well there is no such thing as white maple, but that is a term for hand selected sapwood that is white in color, from the larges logs of course to avoid the dark heartwood. If you are going to stain maple dark this is the way to go.
Natural maple is going to have plenty of darker heartwood mixed with whiter sapwood, mineral streaks where roots have picked up iron or other minerals, and the board will be fairly wide. A lot of shops will use popular for paint grade cabinets or doors but soft maple is much better even if it is more expensive. Popular has its own set of good qualities mainly that wide boards are common and that it shapers very well. Popular is used a lot in Oklahoma City cabinet shops.
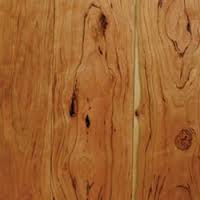

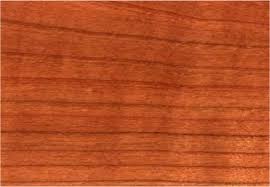
Cherry
Softer than soft maple or red oak but still usable for cabinets. Dents easier, has lighter colored sap wood and true red cherry is one of the more expensive non exotic woods. Straight grained, planes and sands great. Stable in dimension, stains well but accepts a limited color range as their will always be a reddish tinge and as cherry ages it turns darker red as it oxidizes. Rustic grades of cherry are almost as economical as soft maple and red oak but the plywood can be double the cost of maple or cherry plywood. A small cherry kitchen might cost an extra $500.00 for the plywood if it is a rustic grade cherry set. Premium cherry might cost $1,000.00 depending on how much plywood and hardwood is needed.
Cherry
- A bit pricey in premium grades
- Machines and sands well
- Stable and commonly available
- Good for reddish or brown finishes
- Oxidizes as it ages, turns more red
Cherry finishes nice and smooth and soft, such a fine grained wood. The red can be knocked down using a green dye stain to turn it brown. Not too common in Oklahoma CIty kitchens mainly because of the extra cost involved in the materials but it makes a gorgeous kitchen.
A lot of people come into the shop thinking they want alder for their cabinets, liking the red color and rustic nature, but cherry is harder, not that much more per square foot in the rustic grades, and it much harder and denser so you escape the problems that alder brings with it as a cabinet wood. Yes, builders like alder because it is cheap and the can sell it at a premium but it is a trash wood unsuitable for durable cabinets.
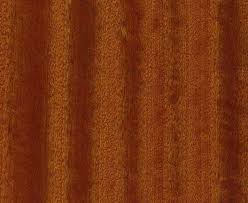
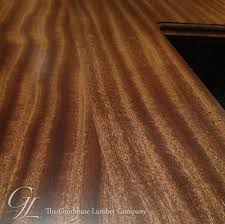
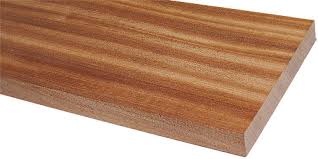
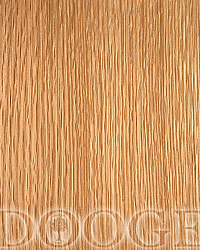
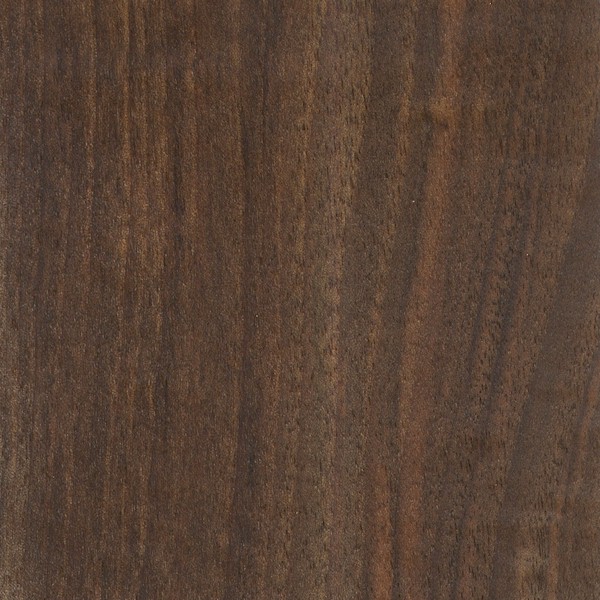
Sapele
Sapele is a West African hardwood that is red in color with a ribbon stripe effect. Straight grained and hard, very stable, one of the few woods that can be stained a darker brown espresso color if you use a green dye stain to knock down the reddish tint.
Sapele
- Very stable and straight grained
- Hard and durable
- Fairly uncommon in Oklahoma kitchens
- Capable of a nice brown espresso finish
Sapele is great for matching the popular brown espresso finish as few woods will turn that brown under stain. The stain can be as brown as brown paint but most woods will only absorb some stain and if there isn’t a lot of pores the brownest stain doesn’t even come close to the espresso look. The plywood and lumber is a bit pricey though so plan on an extra thousand dollars for a medium sized kitchen.

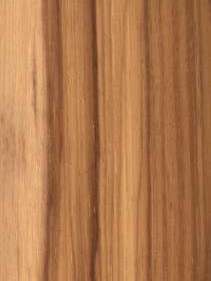
White Oak
Very straight grained and strong, very dense. Most of the pores are plugged with natural lignin. Very stable, will stain mostly brown colors, very durable, holds screws and nails exceptionally well due to the hardness and density. Available quarter sawn and flat sawn, some rift sawn is available on occasion. Craftsman or Stickley style cabinets use white oak. The traditional wood for whiskey barrels due to the plugged pores to limit leaking and exceptional toughness.
White Oak
- Very stable and straight grained
- Hard and durable
- Fairly uncommon in Oklahoma kitchens
- Doesn’t take a lot of stain due to lack of porosity
White oak makes a really distinct kitchen. I’ve only done three or four including the set in our showroom. Makes a nice brown finish as the reddish tint of red oak isn’t present.
There is also quarter sawn white oak, similar to the rift sawn but with the flaking going on. Very distinctive. Expect to pay a premium of around $800 to $1000 depending on the size of the kitchen. Not a lot of moldings or carvings are going to be available in white oak.
Wood that is not recommended for cabinets
Ash which is pretty and inexpensive but it attracts beetles that lay eggs that hatch into worms and devour the hardwood. We have a very nice ash set in the shop that is eaten up with these critters, you can see the sawdust as they push it out of their tunnels.
Hickory or Pecan very hard and brittle wood, tough interlocked grain that is hard to machine and sand smoothly. Cheap but unstable and the same look can be done using a rustic grade of soft maple.
Hard Maple. Nice but expensive, especially the plywood. Fairly brittle wood, doesn’t take a stain very well as it is simply too dense and hard. Not a lot of choice when buying hard maple in Oklahoma City so few Oklahoma City cabinetmakers use the wood.
Junk cabinet woods are problematic
- Unstable or too hard or brittle
- Sometimes cheap but hardly a value
- No need to bring insects into your home
- Makes great firewood after a few years though
Alder very cheap but too soft to make cabinets. Fasteners like screws and nails will wallow out, as will hardware, nails, and screws. It is so soft you can dent it with your fingernails. The boards are small and narrow as the trees are really junk species in the forest. The same look can be achieved using rustic cherry for a little more.
Pine is too soft and unstable. It will shrink a lot over time and split. Completely unusable for cabinet work of any quality.
Walnut is too soft generally and has a lot of sapwood that is nearly white in color so you either by a premium grade or throw a lot of the wood away cutting out the sapwood and even then you will have to put some sapwood on the backside of doors and drawer fronts. The plywood is really expensive. Doesn’t stain well other than dark.
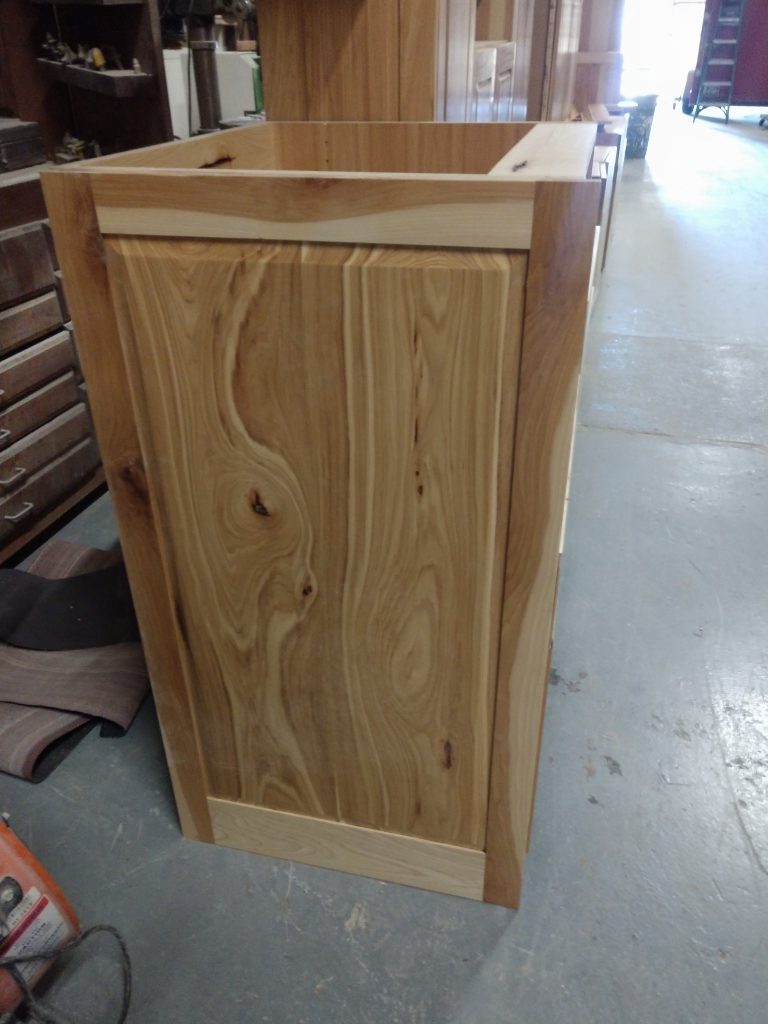
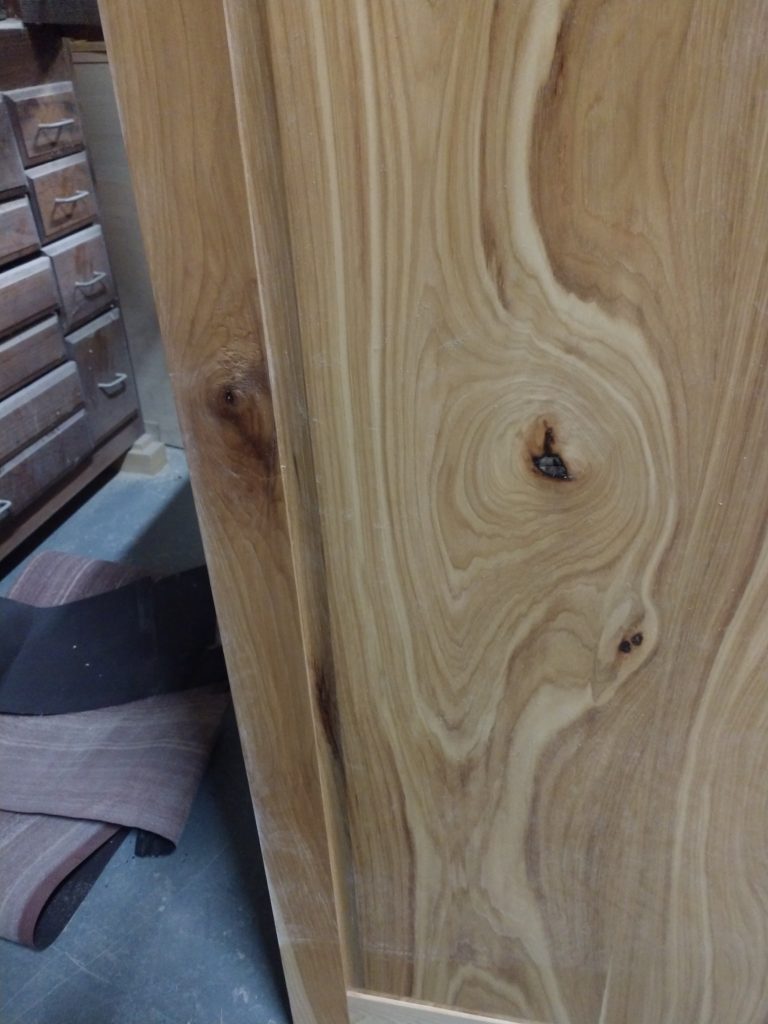
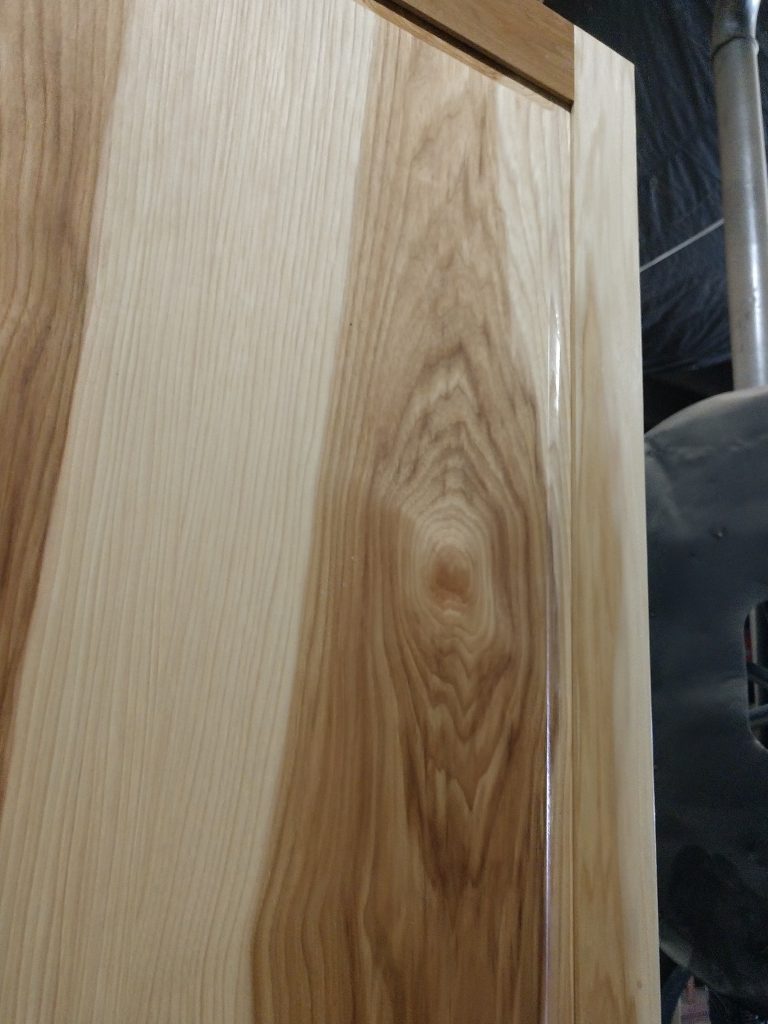
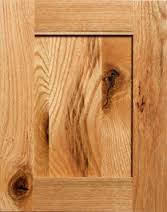
Hickory hardwood
Yeah, we just said not to use hickory or pecan but it is a popular wood and if you know what to expect you can use it.
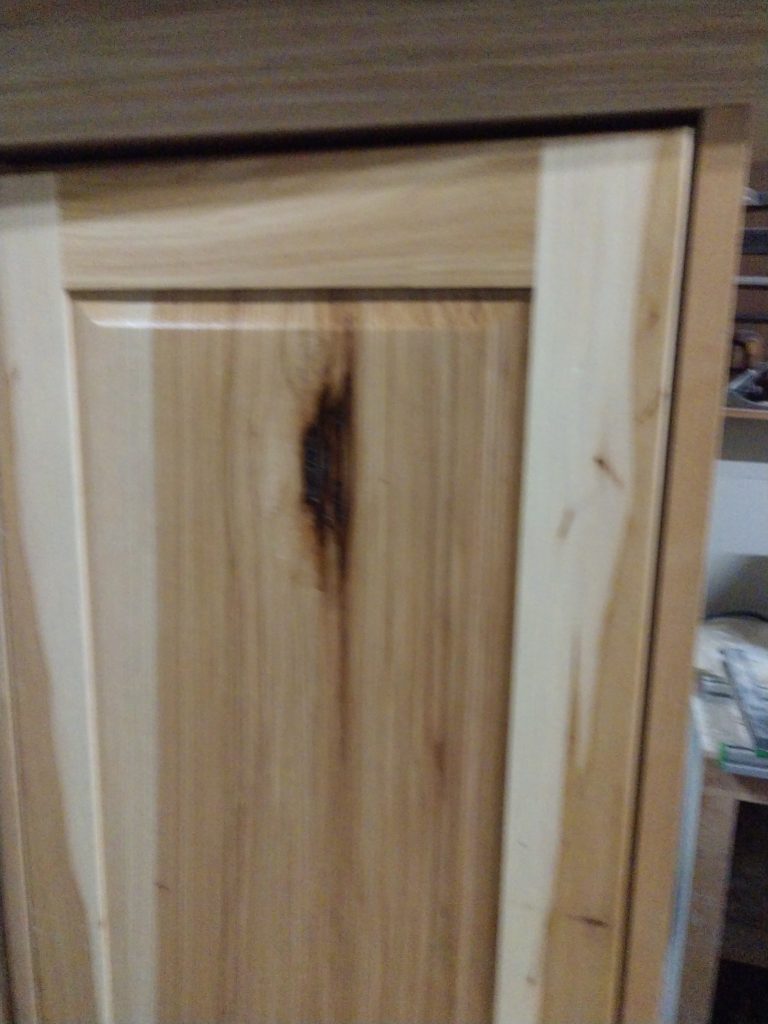
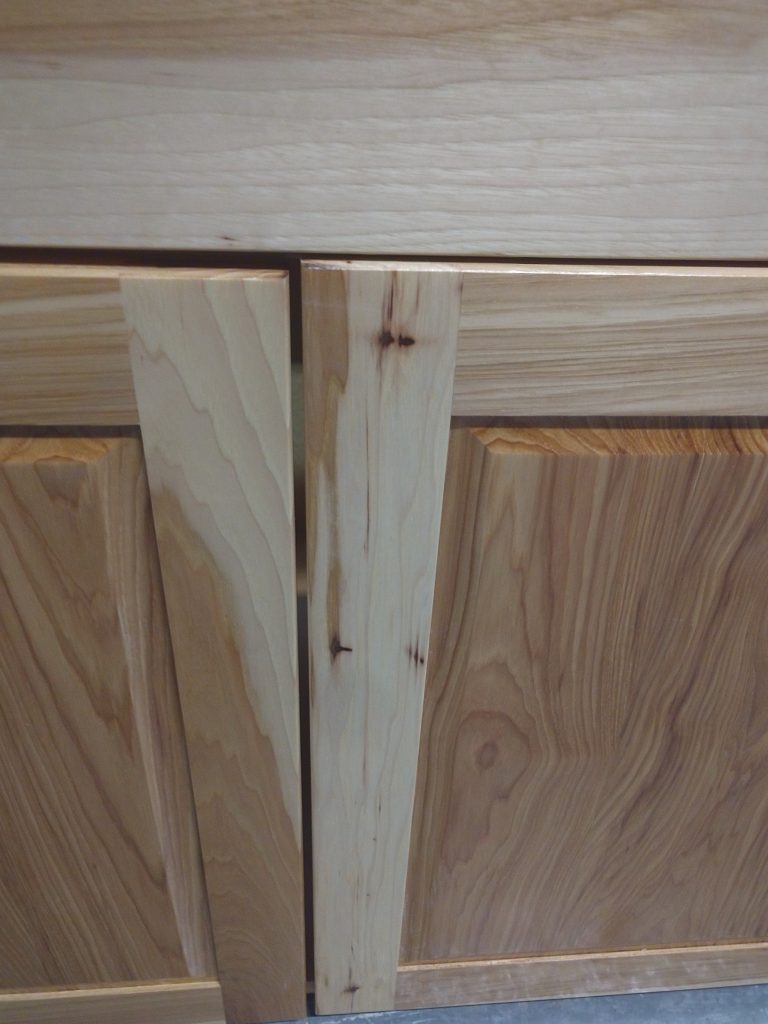
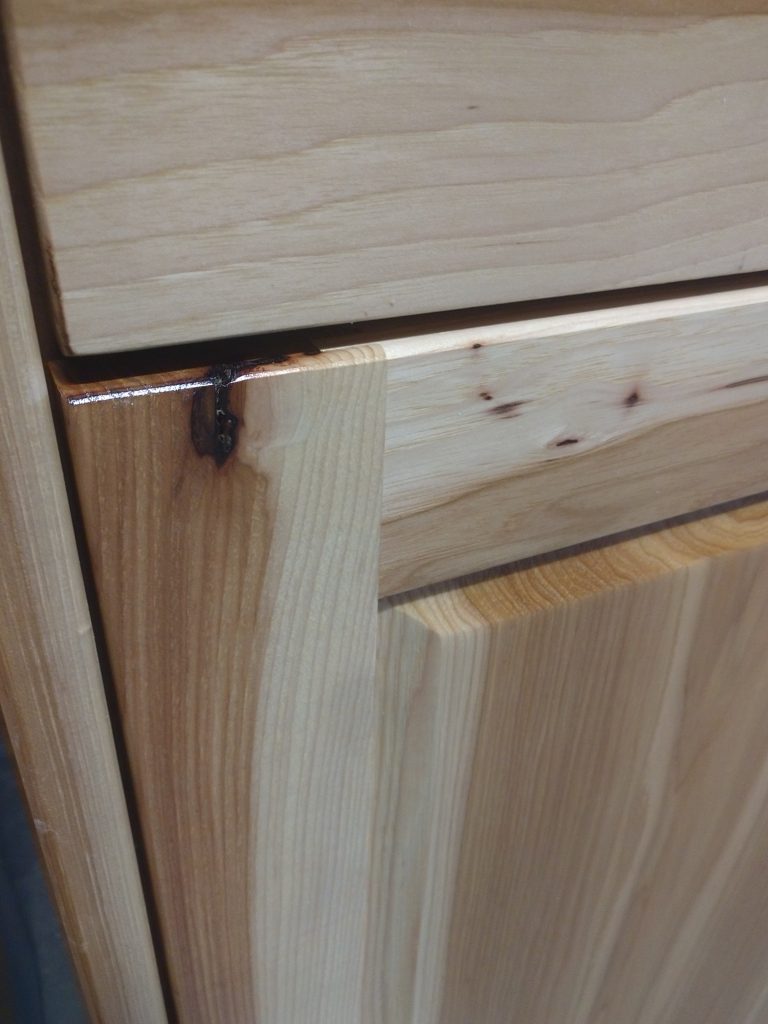
It is a very hard and dense wood which chips and tears out a lot when machining the profiles but it is also a very pretty wood in the rustic style. Heavy, very heavy, so the doors need to be kept moderate size and there are a lot of defects so it is a rustic only wood, defects can be trimmed out most of the time but that means more wood has to be bought and thrown into the firewood pile.
The dark color is the heartwood, the much older center section of the log. Most hickory is not stained, a clear finish is used, but the right brownish/red stain done very lightly results in a complete brown tone, erasing all the white sapwood. Cannot go too dark or the sapwood turns darker as it absorbs more stain than the heartwood. Just get used to the idea that the machining will be more coarse, more roughness, more tear out, so it is a rustic wood.
Hickory is a challenge to use
- hard and brittle, machines poorly, sands poorly
- Sometimes cheaper but very rustic
- Wonderful grain color variation
- Tough as iron, holds screws and nails quite well
Hickory sheet goods are quite expensive as there is little demand so the suppliers that stock it do not compete on price or quality for that matter. They have in stock what they have in stock, no special orders because it would take forever to arrive
The availability of a variety of sizes is a problem too. Usually you can get 1/4″ double side for five part door panels and 3/4″ plywood or MDF veneered sheets for exposed end panels. And that is about it, no 3/16″ thick for the backs, using a cheap Vietnamese birch is about all that is around that comes even close to the sapwood color so you just have to live with that as 1/4″ doesn’t fit well in the upper cabinet back grooves. And the suppliers carry little of the species so it is quite expensive compared to regular prices for red oak or soft maple. The microwave cabinet below shows a Vietnamese birch back in a hickory cabinet with a clear finish. It isn’t brown, but it does somewhat match the sapwood of the hickory.
